Monday, August 10, 2020

Salmon with Creamy Cucumber-Dill Salad

Grilled salmon with a tangy and refreshing cucumber salad over top makes a light and easy weeknight dinner.
Servings: 4


Ingredients

For the Salmon
  • 4 (6-oz) salmon fillets, skin on
  • 1 tablespoon extra virgin olive oil
  • kosher salt
  • freshly ground black pepper

For the Cucumber-Dill Salad

  • 1 English cucumber (also called hothouse cucumber)
  • 1/3 cup finely sliced red onion, from one small red onion
  • 1/2 teaspoon salt
  • 1/4 cup plus 2 tablespoons sour cream
  • 3 tablespoons mayonnaise, best quality such as Hellmann's or Duke's
  • 2 tablespoons white wine vinegar
  • 1/4 cup chopped fresh dill
  • 1 clove garlic, minced
  • 1/2 teaspoon sugar
  • freshly ground black pepper, to taste

Instructions

  1. Cut the cucumber in half and then slice each half down the middle lengthwise. Use the tip of a teaspoon to scoop out the center seeds. Cut each half into thin slices and place in a colander along with the red onion slices. Toss with salt and let sit in the sink for at least 30 minutes, until the water drains out.

  2. In the meantime, make the dressing: combine the sour cream, mayonnaise,
    white wine vinegar, dill, garlic, sugar and black pepper in a medium bowl and mix well.

  3. When the cucumbers and onions are ready, release any excess water by tapping the colander on the base of the sink, then use a large wad of paper towels to pat the vegetables dry. Add to the dressing and toss well. Cover and chill until ready to serve.


  4. Preheat the grill to medium-high heat. Clean the grill rack, then brush lightly with oil. Close the lid and let return to temperature. Rub the salmon with olive oil and season generously with kosher salt (about 3/4 teaspoon) and pepper. Place the fillets skin side down and grill until golden brown and slightly charred, 4-5 minutes (resist the urge to peek or flip early; when fillets are nicely seared on the first side, they should release easily). Flip the fillets over and continue grilling until done, 2-3
    minutes. Let cool slightly, remove the skin if desired, and serve with the cold cucumber-dill salad piled over top or alongside.

Pair with
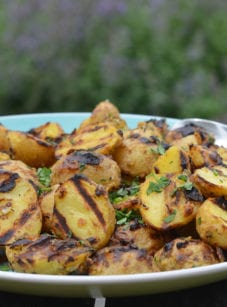
grilled baby potatoes

Monday, August 3, 2020

Pulled Pork in the Crock Pot


(1) 6-7 pound pork shoulder roast or Boston Butt from Harter House
Dry Rub
3-4 drops Liquid Smoke (optional)


My favorite Dry Rub
1 1/2 teaspoons salt
1/2 teaspoon black pepper
1/2 teaspoon oregano
1/2 teaspoon garlic powder
1/2 teaspoon onion powder
1/2 teaspoon paprika
1/4 teaspoon cayenne pepper

Add all ingredients to a small bowl and stir until combined.

Rinse roast with cold water then pat dry with paper towels.  Using your hands, rub roast with Dry Rub until evenly coated.

Cover rubbed roast with plastic wrap and refrigerate overnight if possible.  It’s not a deal-breaker if you can’t but it’s SO much better if it can soak up the flavors of the rub overnight.

Remove the plastic and place the roast, fat-side down, in a large crock pot.  Cover and cook on high for 4 hours.  Do not add water.

Add Liquid Smoke to the broth that has been created from cooking the roast (not directly onto the roast).  Reduce heat to low and continue cooking for 4 more hours.

Remove broth from crock pot to use for gravy or freeze for later use.  Turn crock pot off and let roast rest, covered, for 30-45 minutes.

Remove roast from crock pot.  The meat will “pull” away easily.  Toss or serve with BBQ sauce if desired.

Enjoy!


Tuesday, July 28, 2020

Key Lime Cake


Regular Limes work for this
Fresh Key Lime Cake

For Cake
3/4 cup butter, softened
1 2/3 Cups granulated white sugar
3 large eggs
1 cup milk
2 teaspoons vanilla extract
1/4 cup fresh Key Lime juice or regular lime juice
2 teaspoons lime zest
2 3/4 cups all purpose flour
1 tablespoon baking powder
3/4 teaspoon salt

For Frosting
1/2 cup butter softened
4 oz. cream cheese
2 cups confectioners sugar
2 teaspoons lime zest plus more for garnish
4 tablespoons fresh key lime juice

Instructions

Preheat oven to 350 degrees F
Spray a 9 x 13 pan with non-stick spray.
Mix together butter and sugar.  Add eggs one at a time.
Add milk, vanilla , lime juice, and lime zest to combine.
Add flour, baking powder, and salt.
Mix with electric mixer until well blended.
Pour batter into prepared pan.  Bake for 25 to 30 minutes or until a toothpick inserted in the center comes out clean.
Cool cake and frost with Fresh Lime Frosting

For Fresh Lime Frosting
In a large bowl, beat together the butter and cream cheese with an electric mixer.  Add lime juice and lime zest.  With the mixer on low speed, add the powdered sugar 1 cup at a time until smooth and creamy.
Spread on cooled cake and garnish with additional lime zest.

Recipe Notes

Cheater Note - Buy already made vanilla frosting and add the lime juice and lime zest..

From:  LaughingSpatula.com


Tuesday, June 30, 2020

Patriotic Jello Shots

Have you ever made these cute little patriotic Jello shots?

Its easier than it looks, all you need is Jello, booze and some patience!

First, you need some sort of disposable cups. I’m sure you can find them at any party supply store.


What you’ll need;

(50) 1 oz plastic cups, or (25) 2 oz cups

Red & Blue layers:
3oz box of red Jello
3oz box of blue Jello
2 cups vodka ( I used Smirnoff Raspberry)
2 cups water

White layer:
2/3 cup heavy cream
2/3 cup milk (I used fat free)
2/3 cup vanilla vodka (I used Absolut Vanilla)
1/4 cup sugar
1 teaspoon vanilla extract
1 1/2 teaspoons Knox powdered gelatin
1 1/2 tablespoons water


Directions:

1. Blue layer; Heat 1 cup water, add blue Jello mix, stir until dissolved. Add 1 cup vodka, stir. NOTE; this recipe is pretty strong. If you want less intense Jello shots I would go with 1 1/4 cups water to 3/4 cups vodka. I wouldn’t make them any stronger though, because the gelatin in the jello needs the water to set the alcohol. Not enough water, and they might not set.

2. Distribute evenly into 50 1 oz cups, filling only 1/3 full, then refrigerate until set, about 1-2 hours.

3. Next is the white layer; this is the most difficult part of these tricolor shots! Place powdered gelatin and water in small bowl, let soak for 5 minutes to allow the gelatin to “bloom”. In a medium saucepan, heat cream, milk, sugar and vanilla extract to a simmer, stirring occasionally. Remove from heat, add gelatin and stir to dissolve. Add vanilla vodka. Let cool 10-15 minutes before topping blue layer.

4. Once blue layer is set and the white mixture has cooled, pour an equal amount of the white mixture on top of the blue. You’re almost there!

5. Finally the red layer; it is the same exact thing as the blue. Heat 1 cup water, add red Jello mix, stir until dissolved. Add 1 cup vodka, stir. Cool 5-10 minutes.

6. Once the white layer has set, and red mixture cooled, fill the cups the rest of the way until full. Refrigerate until set, about 1-2 hours.

7. Enjoy some patriotic Jello shots!! =] Garnish with mini flags on toothpicks. Looks super cute, plus using the toothpick to release the Jello from the sides of the plastic cup makes it come out easily without breaking apart.


Plastic cups, vanilla vodka and powdered gelatin.

jello6


Mixing up the red layer!!

jello3


Blue and white layers set, ready for red!

jello4


Finished!! Serve on a party platter with mini American flags =]

jello5


You can see here I skimped on the white a little bit. If you get them as close to even as you can, you should have the perfect amount for 50 shots!

jello2


Everyone have fun and be safe this 4th of July!

Don’t drink too many jello shots =]


Tuesday, June 23, 2020

Ribs, Sauerkraut, Mashed Potatoes and Brown Gravy


My mother invited me to dinner this week, with my Aunt Sally and her husband, Mike..
Mother made a classic German / Bohemian dish of Pork, Sauerkraut, mashed potatoes and brown gravy.  It was so good, I want to prepare it again today.  (There wasn't any leftover at her house)
The secret ingredient is caraway seed.  In our family, we love recipes with caraway.

This time my mother used Baby Back Ribs.
In the past she has used spare ribs, and country style ribs.


INGREDIENTS
1 slab Baby Back Ribs - Membrane removed
salt, pepper,
Cavender's Greek Seasoning
1 Bag Flanagan's Krrrrisp Kraut, drained
1 Tablespoons Caraway Seed

Serve with Mashed Potatoes and (McCormick's) Brown Gravy.


DIRECTIONS
In a 9 x 9 baking dish, place seasoned ribs on the bottom.
Top with drained Sauerkraut,
Sprinkle with Caraway seeds.
Cook in a 350 degree oven for 2 1/2 - 3 hours.
(Meat will fall off the bone)

NOTE
You can also Par-boiled the ribs for about 30 minutes and then reduce the bake time to 1 hour.


Removing the Membrane from Baby Back Ribs
  1. At one end of the rack, slide a dinner knife under the membrane and over a bone.
  2. Lift and loosen the membrane until it tears.
  3. Grab the edge of the membrane with a paper towel and pull it off.
  4. The membrane may come off in one whole piece, or you may need to remove it in smaller pieces.
An interesting fact, when I purchased my Baby Back ribs at Harter House today, the butcher told me they are purchasing ribs with the membrane already removed.  Yay!.  Now I won't forget to remove it.
Harter House also sells a 3-slab Value Pack.  I was told, those may still have the membranes.


Flanagan Kraut is my favorite.
Find it in the Deli Case at Harter House.


I used the regular Cavender's, but they also have a Salt Free Cavender's Seasoning that does not contain MSG. Ingredients: Potassium chloride, black pepper, corn starch, garlic, oregano, flavor base seasoning (Hydrolyzed corn soy protein, sugar, onion powder, spice extractives), parsley and five other spices.


Everyone always enjoys this simple, 
easy to prepare, brown gravy packet.

Just add 1 Cup Water per packet.
I used 2 packets. 


ENJOY


Tuesday, June 16, 2020

Copy Cat Sonic Fried Onion Rings


I ate recently at Sonic and I had forgotten how much I LOVE their onion rings.
So I asked Google and sure enough, I came up with this copy cat recipe.

A former Sonic employee states, "The secret ingredient is vanilla ice milk mix, but using melted vanilla ice cream works just as well."

Making these onion rings can be messy, so it is suggested trying to use one hand for dry ingredients and the other for dipping the onion rings into the melted ice cream. It will go easier this way.


Ingredients


2 pounds Vidalia onions - sliced, and rings separated
24 ounces water
2 cups all purpose flour
12 ounces vanilla ice cream melted
8 ounces corn meal
vegetable oil for frying

Instructions

  • Peel onions. Slice onions into slices that are between 3/8 and 1/2-inch. Remove the small center of the onions, you can chop those into diced onions. Separate onions into rings, and place the rings into a large bowl of water.
  • Place three containers in a row. In the first container, place the flour, in the second container, place the melted ice cream, and in the third container place the cornmeal.
  • Preheat oil to 350 degrees.
  • Prepare onion rings by shaking off the water, dip onion into the flour, shake off excess flour. Dip into the melted ice cream, and then dip into the cornmeal. Gently shake off excess cornmeal. Place the onion ring on a cookie sheet to dry for a few minutes before frying.
  • Fry onion rings until golden brown.

Recipe Tips for the Cook

Sifting the flour and corn meal once in a while keeps lumps out and makes it easier to coat the rings 
When placing on cookie sheets to save room, lean on top of each other to allow entire ring to dry.


How to Make Crispy Onion Rings

Deep-fried onion rings should be crisp on the outside but tender within. 
  1. Heat the oil over medium-high heat. Allow it to heat up hot enough to fry, but not to smoke. The best temperature is 350 - 375 degrees. Use a deep-fry or candy thermometer attached to the side of your pot/frying vessel. This helps you adjust the temperature if it does not remain consistent. If the temperature becomes too low, the rings will soak up too much oil, and you will end up with soggy rings.
  2. Cook the onion rings in small batches, so they don’t stick together. When one side is fried, turn them over to brown on the other side. The process should take about three minutes.
  3. Don’t place your cooked onion rings directly on top of paper towels to drain. If you do so, the onion rings will soak up whatever oil ends up on the paper towel. Instead, place some paper towels on a cookie sheet and then lay a wire cooling rack on top. Place your fried rings on top of the rack to drain, so they don’t sit in oil.
  4. Season with some salt and serve your perfect crispy onion rings immediately.

Tuesday, June 9, 2020

Honey Garlic Salmon


Salmon

The browned butter mixed through that honey garlic sauce is what makes that salmon recipe stand out from the rest. 

Pan Seared Salmon

This salmon gets cooked right in the sauce. There’s no searing or frying first. Why? Because a lot of people get anxiety at the thought of frying then flipping salmon and having the fillets fall apart on them halfway through cooking. 

Q. But how do I get the same crispy edges from searing? A. Once the salmon is half way done, you’re going to broil your fillets for a couple more minutes for that extra golden, crispy and caramelized finish.


For a stronger lemon flavored salmon, add the wedges into the pan when your sauce is bubbling 
(the peel provides all of the flavor this way). For a milder flavor, leave them out. 
Make this Easy Honey Garlic Salmon for your dinner table tonight!


Ingredients

  • 4 fresh salmon fillets about 1/2 pound each, skin off or on
  • Salt and pepper, to season
  • 1/2 teaspoon paprika (mild, sweet or smokey)
  • 2 tablespoons butter
  • 4 cloves garlic, finely chopped or minced
  • 4 tablespoons honey
  • 1 tablespoon water
  • 2 teaspoons soy sauce
  • 1 tablespoon fresh squeezed lemon juice, (plus extra to serve)
  • Lemon wedges to serve

Instructions

  • Arrange oven shelf to the middle of your oven. Preheat oven to broil/grill settings on medium heat. 
  • Season salmon with salt, pepper and paprika. Set aside.
  • Heat the butter in a skillet or pan over medium-high heat until melted. Add the garlic and sauté for about a minute, until fragrant. Pour in the honey, water and soy sauce; allow the flavors to heat through and combine. Add in the lemon juice; stir well to combine all of the flavors together.
  • Add the salmon steaks to the sauce in the pan; cook each fillet (skin-side down if there's any skin) for 3-4 minutes or until golden, while basting the tops with the pan juices. Season with salt and pepper, to taste (if desired).
  • Optional -- Add the lemon wedges around the salmon (adds a stronger lemon taste). 
    Baste salmon one more time then transfer the pan to your oven to broil / grill for a further 5-6 minutes, or until the tops of the salmon are nicely charred, and the salmon is cooked to your liking.
  • To serve, drizzle with the sauce and a squeeze of lemon juice. Serve with steamed vegetables; over rice or with a salad.

FROM;
Cafedelights.com