Tuesday, July 31, 2018

Almond Crusted Stuffed Chicken Breast


I am always looking for new ways to eat chicken.

I recently prepared this recipe on a KOLR-10, Ozarks Live segment.  Perhaps you saw it.
The recipe is really easy to make. 


Ingredients
2 chicken breasts thinned to about 1/4 inch thick (I put each chicken piece in between two pieces of saran wrap and pounded them with my mallet)
1 onion (yellow or white), chopped
1 cup chopped spinach
2 cloves garlic
4 pieces of cooked bacon, crumbled into smaller pieces
Olive Oil
Salt and Pepper
coarsely ground almonds (I used my Magic Bullet.)
Toothpicks (to hold the chicken together!)

Heat a couple tablespoons of olive oil in a saucepan and sauté onions and garlic for about 5 minutes.  Add spinach and bacon pieces, cook a few minutes more until it looks something like this…

Take your thinned out chicken breasts and place them on a cookie sheet. Divide the spinach onion mix and spread onto the chicken. Like this…Except my chicken breast was more flat this this picture.

Roll chicken up and secure with a couple toothpicks. Brush with a little olive oil and sprinkle with salt and pepper. Have  your 
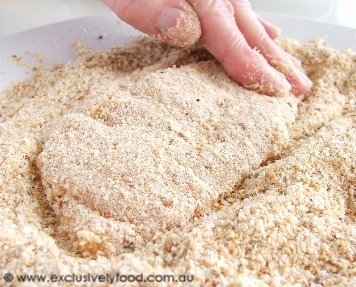
coarsely ground almonds (I put my whole almonds in the food processor and gave it a couple grinds until they were in small little chunky pieces). Roll your 
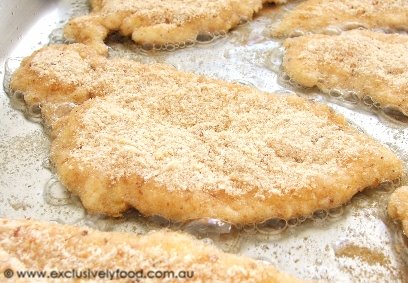
chicken into the almonds and place on a baking sheet. Bake at 350 for 30 – 35 minutes.  When it comes out of the oven it will look something like this…


ENJOY


Tuesday, July 24, 2018

Chicken Parmigiana


This is definitely one of my favorite recipes.
I know you will love it also.  ~Shelly

Tender pieces of crumbed chicken are topped with homemade tomato sauce and grated cheese, and then oven baked until the cheese is golden and melted. The tomato sauce and crumbed, uncooked chicken can be prepared in advance but it is best to cook the chicken and assemble the dish just before it goes into the oven.Serves 4


Tomato Sauce
Makes about 1 1/3 cups.

1 tablespoon oil
1/2 medium onion, peeled and finely chopped
2 large garlic cloves, peeled and crushed
1 can crushed/diced tomatoes
1/2 teaspoon dried basil
1 1/2 teaspoons brown sugar, firmly packed
Salt and pepper


Chicken
4 skinless chicken breast fillets or tenderloins
2 eggs
1 tablespoon milk
1/3 cup plain flour
About 1 cup pamko breadcrumbs
1/2 cup grated parmesan
About 1/2 cup oil, for frying

Cheese Topping1 1/3 cups, Fresh Mozzarella OR grated mozzarella cheese
1/2 cup, lightly packed grated tasty provolone cheese
1/4 cup grated parmesan cheese
Fresh Basil


Heat oil in a heavy-based medium saucepan over medium heat. Add onion and garlic and cook, stirring occasionally, for about 5 minutes, until onion has softened but not browned. Add tomatoes, basil and brown sugar, increase heat and bring to the boil. Once boiling, reduce heat and simmer for about 35-40 minutes, stirring occasionally, until sauce has reached the desired consistency. Add salt and pepper to taste. Set aside for 10 minutes, and then puree sauce in a blender or food processor.

Trim any fat from chicken. If using chicken breasts, cut them in half horizontally. Cover chicken with a freezer bag and lightly pound with the flat side of meat mallet to flatten.
© exclusivelyfood.com.auWhisk eggs and milk together in a bowl. Coat one piece of chicken in flour and shake to remove excess. Then dip the chicken into the egg and milk mixture ensuring that all of the flour is moistened.

Then coat the chicken in pamko breadcrumbs, pressing firmly to ensure crumbs adhere. Repeat with remaining pieces of chicken.


To fry chicken, heat some of the oil in a heavy-based frying pan over medium-high heat. We cook the chicken in two batches using 1/4 cup of oil for each batch (the number of batches will be determined by the size of your frying pan and you'll need to divide the oil evenly between each batch). Fry the chicken in a single layer, without overcrowding the pan, until golden brown.  They will not yet be cooked through.


Wipe the pan out with paper towels between each batch of chicken to remove any crumbs. This prevents the overcooked loose crumbs adhering to the next batch of chicken.

Drain cooked chicken on paper towels.

Place cooked chicken in a large baking dish and spread with sauce. Sprinkle with combined cheeses and basil.


Bake at 200 degrees Celsius (180 degrees fan-forced) for about 15-20 minutes, or until cheese is melted and golden. We sprinkle the chicken parmigiana with chopped parsley before serving.


recipe adapted from
www.exclusivelyfood.com.au


Monday, July 16, 2018

Fish Tacos with Cod

Tacos have been part of Mexico's culinary heritage for well over a hundred years. These folded tortillas can be stuffed with any number of fillings—with each Mexican state claiming stake to their own. Fish tacos are said to come from Baja California, Mexico's northernmost state. While the original fish taco was made with deep-fried fish, this recipe—made with sautéed fish—is a delicious and fresh version. This recipe is easily doubled, which makes it a great dish to make when entertaining a crowd.


Ingredients

1/2 red onion, thinly sliced
About 1 1/2 cups red wine vinegar
1/4 cup olive oil
1 1/2 teaspoons ancho chile powder  **
1 1/2 teaspoons dried oregano
1/2 teaspoon ground cumin
1/4 cup lightly packed fresh cilantro leaves, chopped, plus more for garnish
1 jalapeño, stemmed and chopped
1 pound flaky white fish (such as mahi mahi or cod), cut into 4 pieces
Salt
8 fresh corn tortillas
Mexican crema, *** (Substitute a big dollop of sour cream with 1-2 Tablespoons of buttermilk)
Fresh Tomato Salsa
2 limes, cut into quarters

** Ancho chili powder is not very spicy, so you don't need much crushed red pepper to match the heat. For a recipe that calls for 1 teaspoon ancho chili powder, substitute 1 teaspoon regular chili powder AND 1/8-1/4 teaspoon crushed red pepper.

*** Homemade Mexican Crema by Patrick Calhoun / Mexican Please

This is an easy way to make a homemade batch of delicious, tangy Mexican Crema. 

Ingredients
1 cup heavy cream
1 Tablespoon buttermilk
1/2 lime
pinch of salt
Instructions
Slightly warm 1 cup heavy cream to room temperature in a saucepan
Add 1 Tablespoon buttermilk to the pan and mix well
Add mixture to a jar and lightly cover
Keep jar on counter (or in warm place) for the next 12-24 hours.
Fasten lid tightly and refrigerate
In a few hours it will thicken even more
Add the juice of 1/2 lime and a generous pinch of salt to the jar and mix well
Taste for seasoning
Serve immediately or store in the fridge

Preparation

  1. Marinate the Onion
    Put the onion in a small bowl and pour in enough red wine vinegar to cover well. Set aside for at least 30 minutes or up to several weeks.
  2. Marinate the Fish
    Pour the olive oil into a small bowl and add the ancho chile powder, oregano, cumin, chopped cilantro, and jalapeño. Mix well. Place the fish on a dish and pour the marinade over it, making sure to coat the fish well on both sides. Allow to marinate for 20 minutes.
  3. Cook the Fish
    Heat a nonstick sauté pan over medium-high heat. Remove the fish from the marinade and place in the hot pan (there is no need to add more oil). Season the fish with salt. Cook the fish for 4 minutes undisturbed, then turn over, and cook for another 2 minutes. Remove the pan from the heat and flake the fish into the pan with a fork, making sure to mix in all the marinade that has stuck to the bottom of the pan. Check for seasoning and add more salt if necessary. Set aside.
  4. Heat the Tortillas
    Place four of the tortillas on a plate and sandwich them between two slightly dampened sheets of paper towel. Microwave on high for 45 seconds. Place the warm tortillas in a towel-lined basket or plate and cover. Repeat with the remaining tortillas.
  5. Assemble and Serve
    To assemble the tacos, place a heaping spoonful of the marinated flaked fish onto the center of a tortilla. Top with the marinated onions. Serve accompanied by Mexican crema and salsa.

    Garnish with lime wedges and cilantro sprigs.

COOKING NOTES

INGREDIENTS

Fish
You can use any fish you like so long as you can flake the flesh when it is cooked. Most white fish fall under this category. 
TECHNIQUES
Marinated Onions
Once you make this very simple condiment, you will find yourself keeping a container of these onions in your refrigerator to add to all of your dishes.
Don't be alarmed by the amount of vinegar needed to cover the onions completely. Since you will most likely have onions leftover, keep them submerged in the vinegar in a refrigerated airtight container. You can then use the vinegar for your other cooking needs. The onions will keep for several weeks.

ADVANCE PREPARATION
The onions and fish can be made up to a day in advance. When reheating the fish, you may want to add about 1 tablespoon of water to make sure the fish does not dry out.

Reprinted from Simply Mexican by Lourdes Castro

Monday, July 2, 2018

What's the Difference Between Baby Back Ribs and Spareribs?


Pork ribs are always a treat, whether cooked indoors or outdoors, but what kinds of ribs should you buy? Let's take a look at the two most commonly sold types of ribs: baby back ribs and St. Louis-style spareribs.
Baby back ribs
(Image credit: Christine Gallary)

Baby Back Ribs

Other names: pork loin back ribs, back ribs, or loin ribs
Back ribs are cut from where the rib meets the spine after the loin is removed. The upper ribs are called baby back ribs, but not because they come from a baby pig! They're only called baby because they are shorter in relation to the bigger spareribs.
(Image credit: Christine Gallary)
Each baby back rib rack averages 10 to 13 curved ribs that are 3 to 6 inches long and weigh about 1 1/2 to 2 pounds, which feeds about 2 people.
Baby back ribs are very tender and lean but are in higher demand than St. Louis-style spareribs, so they have a higher price tag.
St. Louis-Style Spareribs
(Image credit: Christine Gallary)

St. Louis-Style Spareribs

Other names: breastbone-off pork spareribs
Spareribs are the meaty ribs cut from the belly of the animal after the belly is removed. They are usually trimmed down into the popular St. Louis-style spareribs by cutting away the hard breastbone and chewy cartilage, so the slab is more rectangular in shape.
(Image credit: Christine Gallary)
St. Louis-style spareribs are flatter than baby back ribs, which makes them easier to brown. There is a lot of bone but also a higher amount of fat, making them very flavorful if cooked properly. Each slab usually weighs 2 1/2 pounds or more and feeds about three to four people, although the meatier, the better. St. Louis-style spareribs are cheaper than baby backs ribs.

Cooking Pork Ribs

Both baby back ribs and St. Louis-style spareribs require low, slow cooking time to become nice and tender. They are great for smoking, braising, grilling, or can be cooked in the oven. The ribs also take well to spice rubs and sauces.
Underside of the ribs
(Image credit: Christine Gallary)

Can You Substitute One Type of Rib for the Other?

Baby back ribs can be substituted for St. Louis-style spareribs, but since they are smaller, you will need about 1 1/2 times the amount of baby backs as St. Louis-style ribs.
The larger size of the St. Louis-style ribs means that they take longer to cook, so note that baby back ribs take about 1 1/2 to 2 hours to cook at 300°F, but St. Louis ribs will take 2 1/2 to 3 hours.
(Image credit: Emma Christensen)

How To Cook Ribs in the Oven

 www.thekitchn.com
Serves 6 to 8


What You Need

Ingredients

4 to 5 pounds pork spareribs or baby back ribs
1/4 cup Dijon mustard
2 teaspoons liquid smoke (optional)
1 cup spice rub, like this one
1 cup barbecue sauce, store-bought or homemade
Equipment
Baking sheet
Aluminum foil
Wire cooling rack
Pastry brush
Knife

 Instructions

Prepare the baking sheet: Line a baking sheet with aluminum foil and set a cooling rack on top. Lay the ribs on top of the rack in a single layer. This arrangement allows for heat circulation on all sides of the ribs.

Season the ribs: Mix the mustard and the liquid smoke, if using, and brush the ribs on both sides. Sprinkle the ribs with the dry rub and pat gently to make sure the rub adheres to the rib meat. Note: This step can be done the day ahead for a deeper flavor. Wrap the seasoned ribs in plastic wrap and refrigerate.


Broil the ribs: Heat the broiler and place an oven rack a few inches below the heating element. Make sure the meaty side of the ribs is facing up. Broil the ribs for about 5 minutes, until the sugar in the dry rub is bubbling and the ribs are evenly browned.

Bake the ribs: Set the oven to 300°F. Move the ribs to an oven rack in the middle of the oven. Roast for 2 1/2 to 3 hours for spare ribs or 1 1/2 to 2 hours for baby back ribs. Halfway through cooking, cover the ribs with aluminum foil to protect them from drying out.

Brush with barbecue sauce: About 30 minutes before the end of cooking, brush the ribs with barbecue sauce, re-cover with foil, and finish cooking.


Rest the ribs and serve: The ribs are done when a knife slides easily into the thickest part of the rib meat. Let them rest, covered, for about 10 minutes, and then cut between the bones to separate the individual ribs. Serve immediately with extra barbecue sauce for dipping.