Tuesday, December 22, 2020

Bacon Wrapped Scallops with Brown Sugar


Delicious, sweet, salty, and springy scallops.
They are hands-down on of my all time favorite foods.


Ingredients

  • 4 strips bacon, *approximately - used 1/2 slice of bacon for each scallop.
  • 2 tbsp butter
  • 1 lb scallops
  • 1 tsp sea salt
  • 1 tsp pepper, fresh cracked
  • 1 tsp garlic powder
  • 3 tbsp brown sugar
  • 1 tsp ginger

Instructions

  1. Pat scallops dry with a paper towel. 
  2. In a large pan, start to crisp bacon. Cook bacon until golden brown - but still soft and pliable. 
  3. In a small bowl, mix salt, pepper, and garlic and then sprinkle generously over scallops. 
  4. Wrap each scallop with 1/2 bacon strip and secure by pushing a toothpick through the bacon and scallop. 
  5. In another small bowl, mix brown sugar and ginger. 
  6. Sprinkle brown sugar and ginger mixture all over scallop, but reserve much of the sugar and ginger to sprinkle after the scallops flip once. 
  7. Heat butter in large pan until foamy and melted. 
  8. Add scallops to pan and cook on medium high heat. Flip after 5-6 minutes, sprinkle with more sugar and ginger, and continue repeating steps until scallops are cooked. 
  9. Serve immediately. 


From:  Sweetcsdesigns.com
Step by step directions, plus more delicious recipes, from author Courtney O'Dell.


Tuesday, December 15, 2020

Garlic Herb and Parmesan Butter

With light jazz music playing on my stereo, I am now ready to concentrate on planning this evening's meal. Tonight I will entertain some friends.

As an appetizer I have a Breton Mini Cracker topped with a small slice of Brie Cheese and a spot of Tabasco Pepper Jelly.


I will serve Delicious USDA Choice Bone-In Rib Steaks.


Also Baked Potatoes, Asparagus Spears, and Caesar Salad.

And of course, followed by something sweet, yet to be determined.

What will make this meal extra special, beside the Harter House Strip Steak, is a Garlic Herb Butter to top the meat, asparagus and crusty french bread.

Make this butter ahead so that the spices have time to infuse the butter.

Garlic Herb and Parmesan Butter

Ingredients
8 ounces softened unsalted butter **
4 cloves garlic, minced
2 tablespoons fresh flat leaf parsley, chopped
2 tablespoons fresh basil, chopped
2 tablespoons green onion, chopped
1/4 cup grated Parmesan
Salt and pepper, season to taste

Directions

Combine all ingredients and refrigerate.

**I like European Plugra Butter found at Harter House.
Find many more flavored butter recipes at http://www.plugra.com/recipes

Tuesday, December 1, 2020

Banana Bread & Anise Christmas Cookies


One of the best parts of the Christmas holiday is walking into a house that smells like someone has been baking all day. The sweet aroma of spice, apple, cinnamon, nutmeg, and cookie dough wafts around the house like a new type of air freshener.

Christmas desserts are a favorite part of any family Christmas gathering. What makes it even more special is that many Christmas dessert recipes are passed down from generation to generation. Maybe your grandmother had some great Christmas dessert recipes that have been passed down to you that you haven’t tried yet. Why not try them this year?
Find everything you need for your favorite holiday recipe at Harter House and Harter House World Flavors.


Typical Christmas desserts are: brownies, cupcakes, muffins, hard candy, chocolate candy, and cookie bars. Cakes involving candy canes, peppermint, or any other type of mint as an ingredient, garnish, or topping are often prepared for Christmas as well. In addition, any cake recipe can be adapted for Christmas with a little bit of creativity. Fudge and puddings also make wonderful Christmas desserts.

But before, after and during Christmas dessert you also need some Christmas candy. That Christmas candy jar on the coffee table should never be empty. Christmas candy is the ice breaker when visitors come to your home. Hard candy, soft candy, citrus peel candies, truffles, brittle, and the like are all interesting treats to nibble on during Christmas. 

***********************************************************

How about some delicious Banana Bread?


1 cup butter for shortening
5 over-ripe bananas, mashed well
2 ½ cups sugar
4 eggs
¾ cup buttermilk
3 cups flour
1 ½ teaspoon baking soda
½ teaspoon salt
1 cup chopped nuts
1 ½ teaspoon vanilla


Combine shortening, bananas and sugar.
Slowly add eggs, one at a time and beat well.
Sift baking soda, flour and salt together.
Alternately add the other dry ingredients along with the buttermilk to the batter mixture.
Add the vanilla and nuts and mix the banana bread recipe mixture well.
Bake the mixture for 70 to 80 minutes at 325 degrees or until a toothpick comes out clean from the bread.

This Christmas Dessert Recipe Serves 16.

You will need two greased loaf pans for the entire banana bread recipe mixture. Do not fill to the top since the banana bread recipe will rise, you might like to give at least an inch space from the rim of the loaf pans.

****************************

Anise Christmas Cookies


4 eggs
4 cups confectioners’ sugar
2 teaspoons lemon zest
4 1/2 cups cake flour
1 teaspoon baking powder
4 drops anise oil


Beat together sugar and eggs until very fluffy.
Add anise oil and lemon zest.
Gradually mix in the baking powder and flour blending well as you go.
Chill this dough for at least 4 hours or overnight, if you wish.
Flour a dough rolling area and roll out the chilled dough to roughly 1/8th to 1/4th inch thick.
Use a springerle rolling pin or a pressboard to make the designs these cookies are so well known for.
Cut into desired shapes.
Let these sit out overnight, uncovered.
The next day bake them for 15 minutes at 350 degrees F.
Cool on a wire rack then store in an airtight container.

This Christmas Cookies Recipe makes 3 dozen.

These cookies have been called many things over the years. Whatever name you call it by it’s sure to turn into a holiday tradition.

Monday, November 16, 2020

Leftover Pie


This recipe comes from A Bountiful Kitchen
abountifulkitchen.com

What to do with all of your leftovers from holiday meals?
Make a Thanksgiving leftover pie of course! So easy to make and everyone will love leftovers packed into a savory pie!

The key to Best Thanksgiving Leftover Pie is to layer correctly and make sure to have enough moisture (gravy) to keep the pie from being dry. I start with putting the dressing on the bottom, potatoes next and then the gravy and meat together. If you want to throw in some corn or peas or green beans, they will only add to the goodness! Just remember to not fill the pie too full or overload with stuffing and potatoes or you’ll end up with a dry pie. You can also double the gravy and serve it along side the pie after it’s baked which I highly recommend!

Add a green salad and you’re set. It’s a main dish loaded with everything savory we love. Pair it with Fresh Cranberry Sauce for the perfect accompaniment to this dinner!

Ingredients

  • 2 cups mashed potatoes
  • 3 cups stuffing
  • 2 1/2 cups turkey or chicken, boneless, skinless
  • 4 tablespoons butter
  • 1/3 cup all purpose flour
  • 1/2 teaspoon pepper
  • 1 teaspoon sea salt
  • 2 cups chicken broth (no MSG)

for crust:

  • 2 cups all purpose flour, plus another 1/2 cup for rolling out and adding to pastry
  • 1 teaspoon sea salt
  • 1/2 cup + 2-3 tablespoons cold water
  • 1/2 cup shortening I use half butter flavor and half regular Crisco

Instructions

  1. Remove leftover stuffing and mashed potatoes from refrigerator. 
  2. Preheat oven to 425 degrees (or 400 convection), place rack on lower third of oven. 

Make gravy:

  1. Melt butter, add flour, whisk until smooth over medium heat. Slowly add chicken broth half cup at  a time, whisk until gravy is smooth and thickened, about 4-5 minutes. Season with salt and pepper. Turn off heat and set aside. 
  2. Place 2 1/2-3 cups chopped chicken or turkey in gravy. Leave sitting on stove top with heat off. 

Make pie crust:  

  1. Place 2 cups flour in a medium size bowl. Add salt. Cut shortening into flour mixture until the shortening is pea sized, using a pastry cutter. 
  2. Add 1/2 cup of the water and fold the water into the flour/shortening mixture with a fork. This should take a few seconds. When the dough begins to come together, if it is still a little dry to form a ball, add a couple more tablespoons of water. You should be able to press the dough together into a ball. 
  3. Split the dough in half. Roll out half of the dough a floured surface,  into a circle about 3 inches larger than the pie plate. Place the rolled out dough into a 9 inch by 2 inch deep pie plate. 
  4. Place 3 cups of leftover stuffing on top of the bottom crust. Top with 2 cups of mashed potatoes (it's okay if the mashed potatoes are crumbly!).
  5. Add gravy and meat mixture on top of the mashed potatoes. 
  6. Roll out remaining dough and top the pie. Cut slits for steam to escape. Crimp edges, folding under to keep gravy inside of pie. 
  7. Bake for 40 minutes or until crust is golden and gravy is bubbly. Let sit for 10 minutes before cutting. 
Recipe Notes
  • If you don't have enough leftover turkey, you may cook chicken or use chicken previously cooked.
  • Don't increase the amount of stuffing or mashed potatoes by too much or your filling will be dry. The gravy to filling ratio in this recipe is just right!
  • You may use a store bought crust if you don't want to make your own. 
  • If you want to make this in a 9x13, roll out the pie dough to a rectangle and just fit the crust on top, no need to make a bottom crust! 

Chardonnay paired with Chicken Makhani (Indian Butter Chicken)

Chardonnays have become very popular.

It is unmistakable in the mouth because of its impeccable sugar/acid balance, its full body, and its easy smoothness. Its aroma is distinct, yet delicate. 

Chardonnay grapes are relatively resilient and are able to survive in a variety of environments. It is used in so many different places to produce so many different wines because the Chardonnay grapes themselves are relatively neutral in flavor. Most of their flavor is derived first from the conditions in which the grapes are grown and second from the conditions of the wine production. This makes it easier for different wineries to produce distinctly different Chardonnay wines.

Typical Chardonnay characteristics include; Lemon, Apple, Tropical Fruit, Melon, Pineapple, and Mango. 

Oaked Chardonnays can display characteristics like; Smoke, Vanilla, Spice, Toast, Nuts, Butterscotch, Caramel, Coconut, Cloves and Cinnamon. 

Unoaked or less heavily oaked Chardonnays tend to have lighter, delicate flavors which can be matched with a fairly wide variety of dishes. There are some foods which tend to go better than average with Chardonnay such as Chicken, Turkey, Fish, Pork and mushrooms. 

More heavily oaked Chardonnays go poorly with delicate dishes, like fish, but pair well with Japanese Cuisine, Chinese Cuisine, Spicy Dishes and Smoked Fish.

Harter House World Flavors offers a wide variety of Chardonnay’s. Of course , my favorite is La Crema, an exquisite Chardonnay.


Chicken Makhani (Indian Butter Chicken) 

1 tablespoon peanut oil 
1 red onion, finely chopped 
1/4 white onion, chopped 
2 tablespoons butter 
2 teaspoons lemon juice
1 tablespoon ginger-garlic paste 
1 teaspoon garam masala 
1 teaspoon chili powder 
1 teaspoon ground cumin 
1 bay leaf o 1/4 cup plain yogurt 
1 cup cream o 1 cup tomato puree 
1/4 teaspoon cayenne pepper, to taste 
1 pinch salt 
1 pinch black pepper 
1 tablespoon peanut oil 
1 lb boneless skinless chicken thighs cut into bite size pieces 
1 teaspoon garam masala 
1 pinch cayenne pepper 
1 tablespoon cornstarch 
1/4 cup water 

Directions: 
Heat 1 tablespoon oil in a large saucepan over medium high heat. 
Saute shallot and onion until soft and translucent. 
Stir in butter, lemon juice, ginger garlic paste, 1 teaspoon garam masala, chili powder, cumin and bay leaf. 
Cook, stirring, for 1 minute. 
Add tomato puree and cook for 2 minutes, stirring frequently. 
Stir in half-and-half and yogurt. 
Reduce heat to low and simmer for 10 minutes, stirring frequently. 
Season with salt, pepper and cayenne. 
Remove from heat and set aside. 
Heat 1 tablespoon oil in a large heavy skillet over medium heat. 
Cook chicken until lightly browned, about 10 minutes. 
Reduce heat and season with 1 teaspoon garam masala and cayenne. 
Stir in about 1/3 of the sauce and simmer until liquid has reduced and chicken is no longer pink, about 5 minutes. 
Pour the rest of the sauce into the chicken. Mix together cornstarch and water, then stir into the sauce. Cook for 5 to 10 minutes.

Tuesday, October 20, 2020

Sign up for Digital Coupons


If you want additional savings when you grocery shop,
Digital Coupons can give you that added value and savings.

Four Harter House locations are offering Digital Coupons.
Republic Road, in Springfield, Nixa, Hollister and Kimberling City.

Sign up for digital coupons at  Shop.HarterHouse.com

Or on your phone at Freshop.com


This website is also used for Curbside Delivery.

  • Create an Account, or you may have already signed up.
  • Under MY STORE, Follow the link for Digital Coupons.
  • Browse the selection of featured Digital Coupons. 
    Harter House may not carry all coupon products.
  • Select and add digital coupons to your account by using the link, "Clip and Save". 
  • Redeem Digital Coupons at checkout, by giving the cashier your phone number.
    Coupons can only be applied to one product purchase per item.

As I write this today, there are 243 coupons available on the site.

You can view all available coupons or sort by categories;
Grocery (46)
Baby (1)
HBC (1)
Feminine Hygiene(1)
Incontinence (1)
Foods (97)
Personal Care (49)
Beverages (4)
Baby and Toddler (9)
Pet Care (21)
Health Care (12)
Household (1)

There is also a search, just above the coupon offerings, and you can search;
e.g. Cheese (3 items came up)
To get back to all available coupons, clear the search item, and click search again.

When you register, you will be asked to give your email address.  You will receive a monthly newsletter and special e-mail-only offers for additional savings throughout the store.  We will not fill your inbox with ads.

Get Started TODAY.
  • Go to the website.
  • Create an account.
  • Download the coupons you want.
  • Redeem at checkout
It's quick and easy.


Tuesday, October 6, 2020

Chow Chow Relish

INGREDIENTS

5 cups white distilled vinegar
3 cups granulated sugar
2 tablespoons kosher salt 
1 tablespoon whole cloves 
1 tablespoon mustard seeds 
1 tablespoon whole black peppercorns 
1 teaspoon yellow mustard powder
1 teaspoon ground turmeric 
Pinch crushed red pepper flakes 
1 bay leaf 
4 green tomatoes, finely diced 
2 green bell peppers, finely diced 
1 red bell pepper, finely diced 
1 large sweet onion, such as Vidalia, finely diced 
1/2 head cabbage, shredded (about 6 cups) 


DIRECTIONS

  1. Clean and sterilize 2 quart-size canning jars with lids.

  2. Add the vinegar, sugar, salt, cloves, mustard seeds, peppercorns, mustard, turmeric, red pepper flakes and bay leaf to a large saucepan over medium heat. Bring to a simmer and cook, stirring occasionally, until the sugar dissolves and the flavors start to marry, about 5 minutes.

  3. Add the green tomatoes, green and red bell peppers, onion and cabbage and bring to a boil, lower the heat and let simmer, stirring occasionally, for 15 to 20 minutes. Remove from heat. Divide the mixture between the two jars and let cool to room temperature. Serve immediately or seal and refrigerate for up to 6 weeks. 

Best Fudgiest Brownies


Perfect crisp crackly top, super fudgy center, chewy and gooey in all the right places, studded with melted chunks of chocolate!


Ingredients
  • 1 cup unsalted butter, melted and cooled
  • 2 tablespoons vegetable oil
  • 1 1/4 cups white sugar
  • 1 cup  packed light brown sugar
  • 4  large eggs, at room temperature
  • 1 tablespoon pure vanilla extract
  • 3/4 teaspoon salt
  • 1 cup all purpose flour
  • 1 cup good quality, unsweetened cocoa powder
  • 7 oz roughly chopped chocolate or large chocolate chips

Instructions

  • Preheat oven to 175°C | 350°F.
  • Lightly grease an 8x12-inch baking pan* with cooking oil spray. Line with parchment paper (or baking paper); set aside.
  • Combine melted butter, oil and sugars together in a medium-sized bowl. Whisk well to combine. Add the eggs and vanilla; beat until lighter in color (another minute).
  • Sift in flour, cocoa powder and salt. Gently fold the dry ingredients into the wet ingredients until JUST combined (do NOT over beat as doing so well affect the texture of your brownies).
  • Fold in 3/4 of the chocolate pieces.
  • Pour batter into prepared pan, smoothing the top out evenly, and top with remaining chocolate pieces.
  • Bake for 25-30 minutes for just under-done brownies (fudgier texture) or until the center of the brownies no longer jiggles and is JUST set to the touch.
    OR 35-40 minutes if you like your brownies well set and firm.NOTE: Brownies will continue baking and set in the hot pan out of the oven. If testing with a toothpick, the toothpick should come out dirty for fudge-textured brownies.
  • After 15-20 minutes, carefully remove them out of the pan and allow to cool to room temperature before slicing into 16 brownies. They set while they cool.

    ENJOY!

OPTIONAL ADD INS:

  • Crushed walnuts, peanuts, almonds, pecans, etc. Chocolate chips, peanut butter chips, shredded coconut, dried fruit (cranberries, raisins, etc)

STORING:

  • Store at room temperature for 3 days, or refrigerator for up to 5 days. These brownies can also be frozen for up to 3 months. Thaw overnight the refrigerator and bring to room temperature before serving OR reheat in the microwave.

Notes

*For thicker brownies, bake in a 7x11-inch pan for 40-45 minutes. For thinner brownies, bake in a 9x13-inch pan for 18-20 minutes.
PLEASE NOTE: An 8x12-inch pan bakes the most perfect brownies -- thickness and texture.
TIPS AND TRICKS:
  1. Do NOT over beat your batter once the flour and cocoa powder are added. That creates air pockets in the batter which will give you cake-like textured brownies.
  2. Please try not to over bake them. Set a timer if you need too. I like mine at exactly 23 minutes in an 8x12-inch pan. You can go a little bit over if you like them set a bit more, but I don't recommend it if you're looking for the fudgiest brownies in the world. Remember, they will continue to bake slightly in the hot pan once pulled out of the oven,
  3. I bake my brownies on the top shelf in the oven. I find the middle shelf cooks them a lot faster, slightly burns them on the top and dries them out.
From Karina at Cafe Delites


Tuesday, September 15, 2020

Weight Loss and Nakato's-Inspired Stir-fried Chicken and Vegetables

I read in a Monday Motivation, "If something doesn't change, nothing will change."

I also saw the message, "If you don't make time for your wellness, you will be forced to make time for your illness. Read that again."

On Friday, August 28, 2020, I decided I had to focus on my health and diet AGAIN.
In looking back at the last time I actually recorded my weight, since January 15th this year, I had gained 22 pounds.  I felt it.  Again, my clothes aren't fitting and I don't feel good in clothes that are fitting.

Last year I documented my weight loss journey and blogged about it weekly.  I had some good information in those blogs.  They were titled:


If you're interested I think there is some good motivation in these blogs.  I recently reread them and I remember feeling like my weight was coming off quickly.

~~~~~~~~~~~~~~~~~~~~~~~~~~~~

Again, I am focusing on drinking my water.  I'm striving for 100 ounces.
I hired a personal trainer for 2 days a week.  He is making me send him pictures of everything that I am eating, including my beverages.
And most days I am tracking the calories, trying to stay at about 1300 for the day.
On the days I don't work out, I am supposed to walk 30 - 45 minutes.

I am also searching online for healthy recipe ideas. I hope to share some of those healthy meals.
Basically, I am striving to add lots of vegetables into my meals.

One of my favorite dinners has been this Stir-Fried Chicken and Vegetables.

Ingredients

1 tablespoon olive oil
4 oz Chicken breast
Broccoli
Carrots
Mushrooms
Onions
Zucchini

Spicy Yummy Yummy Sauce

1 Tablespoon Real Mayonnaise (Hellman's)
1 Tablespoon Sriracha
2 Tablespoons Milk (2%)


I thought I was making a LOT of vegetables, but they definitely cooked down.  Or perhaps I overcooked them.  I started with about 2 cups of vegetables.  Next time I may double that.  And I was only cooking for ONE person, me.

My fitness Pal added this entire meal at 516 Calories.  

Take away - fill up on vegetables!

PS, As of Sept 15. 2020, I am down 9 lbs.
It really does come off fast when you stick to a low calorie diet, incorporating healthy, real food, and skip the alcohol.


Monday, September 7, 2020

Ground Beef Enchiladas


These Ground Beef Enchiladas are so tasty and easy, you’ll never go back to canned enchilada sauce. Corn tortillas filled with flavorful ground beef, melty cheese and a killer homemade red enchilada sauce.

This beef enchilada recipe is really so simple, that you might have all the ingredients you need already on hand. Start with a pound of extra lean good quality ground beef. I prefer to sauté the onions and jalapeños, then add the garlic just before adding the ground beef. This brings out the flavors of the aromatics. A small amount of sugar balances the acidity of the tomato sauce.


How to Make Beef Enchiladas – Time Saving Tip!


Prepare as much as you can ahead, dice and shred and have everything laid out. Once you have everything prepared, set up an assembly line to make the enchiladas. In this enchilada recipe, the beef and sauce is cooked together in one pot. For assembly, rather than separating the meat and the enchilada sauce, I use a slotted spoon to spoon the meat mixture into each tortilla, then top with cheese and roll. Once the beef has been evenly divided into the tortillas, use the remaining sauce in the pan to top the enchiladas and bake.


Good Quality Spices and Fresh Herbs

I love the flavor of cilantro, but if you don’t you can certainly skip it. For freshness, try chopped fresh parsley instead. I also like the extra flavor of smoked paprika in this recipe, but you can substitute regular paprika as well.


Frying the Tortillas for Enchiladas

In a small frying pan, lightly fry tortillas in a shallow amount of vegetable or canola oil. You just want the tortillas to be soft and pliable, not crispy. Lightly frying the corn tortillas prevents them from getting soggy once you bake the enchiladas. The oil acts as a barrier and keeps tortillas from absorbing too much liquid from the sauce.


Beef Enchiladas Recipe

The best part of this recipe is that it’s easily doubled or tripled. It’s a great dinner to make and take. Make one for home and one for a friend or neighbor. These beef enchiladas freeze really well too! Just assemble, let cool completely, cover tightly and freeze.


Ingredients
  • 1 tablespoon vegetable oil plus additional for frying tortillas
  • 1/2 cup onion finely diced
  • 1 jalapeno minced and seeds removed
  • 4 cloves garlic minced
  • 1 pound 93/7 lean ground beef
  • 1 cup beef broth low sodium
  • 2 8 oz cans tomato sauce good quality
  • 2 tablespoons chili powder
  • 1 teaspoon smoked paprika
  • 1 tablespoon sugar
  • 1 teaspoon cumin
  • 1 teaspoon kosher salt
  • 1/2 teaspoon freshly ground black pepper
  • 2 tablespoons cilantro chopped
  • 12 corn tortillas
  • 16 oz Colby-jack cheese shredded
  • sour cream for serving
Instructions
  1. In a large skillet, sauté onions and jalapeño over medium low heat until onions start to soften and turn translucent, 2-3 minutes. Stir in garlic and cook 1 minute more. Increase heat and add ground beef to skillet and brown until cooked through. Add beef broth, tomato sauce, chili powder, sugar, cumin, salt and pepper to pan and stir to combine. Let simmer over low heat for 10 minutes or until sauce has reduced slightly. 
  2. Meanwhile in a second smaller skillet, lightly fry corn tortillas in hot vegetable oil. Tortillas should still be pliable for rolling. Set tortillas aside with paper towels between each layer. Once sauce has reduced slightly, stir in 2 tablespoons of chopped fresh cilantro.
  3. Preheat oven to 400 degrees and spray a 9x13 baking dish with non stick cooking spray.
  4. To assemble enchiladas, start by adding 1/2 cup of enchilada sauce mixture in bottom of baking pan. Use a slotted spoon to evenly divide meat mixture into each of the tortillas, then divide 8 oz of cheese between all 12 enchiladas, roll and place seam side down in baking dish. Pour remaining enchilada sauce over rolled enchiladas and top with remaining cheese.
  5. Cover dish with foil and bake at 400 degrees for 20-30 minutes, or until heated through and hot and bubbly. Sprinkle with additional fresh cilantro and serve with sour cream.


This recipe comes from Melissa at;

Apple Coffee Cake with Crumble Topping and Brown Sugar Glaze

Level - EASY
Prep Time - 30 minutes
Cook Time - 45 Minutes
Yieild - 12 Servings

This recipe comes from 


Ingredients


Cake: 
1 stick plus 2 teaspoons unsalted butter
1 1/2 cups packed light brown sugar
2 large eggs
2 cups all purpose flour
1 teaspoon baking soda
2 teaspoons ground cinnamon
1/2 teaspoon salt
1 cup sour cream
1 teaspoon pure vanilla extract
2 cups peeled, cored and chopped apples
Crumble Topping:
1/2 cup packed light brown sugar
1/2 cup all purpose flour
1/2 teaspoon ground cinnamon
4 tablespoons unsalted butter, softened
Brown Sugar Glaze:
1/2 cup packed light brown sugar
1/2 teaspoon vanilla extract
2 tablespoons water


Directions

  1. Preheat the oven to 350 degrees F. Lightly grease a 13 by 9-inch glass baking dish with 2 teaspoons of the butter.
  2. In a large bowl, cream together the remaining stick of butter and sugar until light and fluffy. Add the eggs 1 at a time, beating after the addition of each. In a separate bowl or on a piece of parchment, sift together the flour, baking soda, cinnamon, and salt. Add to the wet ingredients, alternating with the sour cream and vanilla. Fold in the apples. Pour into the prepared baking dish, spreading out to the edges.
  3. To make the topping, in a bowl, combine the sugar, flour, cinnamon, and butter, and mix until it resembles coarse crumbs. Sprinkle the topping over the cake and bake until golden brown and set, 35 to 40 minutes. Remove from the oven and let cool on a wire rack for at least 10 minutes.
  4. To make the glaze, in a bowl, combine the sugar, vanilla, and water and mix until smooth. Drizzle the cake with the glaze and let harden slightly. Serve warm. 


Monday, August 10, 2020

Carolina Pulled Pork Sliders with Mustard


Sometimes, I give you my tried and true recipes, and sometimes I run across a recipe that sounds wonderful and I want to share it, before I've had a chance to try it.  This is one of those recipes.  It looks awesome.  The process is very similar to what I've done in the past.  I'm definitely going to give this one a try! 
~Shelly


This will work great with a Pork Shoulder or a Pork Butt. 

FOR THE RUB
2 teaspoons dry mustard
2 teaspoons sweet paprika
2 teaspoons salt
1 teaspoon freshly ground black pepper
1 teaspoon ground white pepper
1 garlic powder
1 teaspoons teaspoon onion powder
1/2 to 1 teaspoon cayenne pepper
1 Boston butt Roast

FOR THE MOP SAUCE
2 cups distilled white vinegar
1/2 cup Dijon mustard
1/2 cup water
1 tablespoon salt
2 teaspoons freshly ground black pepper

FOR SERVING
24 small buns
6 tablespoons butter (optional), melted
Thinly sliced sweet or dill pickles


Combine the dry rub ingredients in a small bowl and stir to mix. Sprinkle the rub all over the pork, patting it onto the meat with your fingertips. Let the pork cure at room temperature while you make the mop sauce.

Make the mop sauce. Combine the vinegar, mustard, water, salt and pepper in a large nonreactive mixing bowl, add 1/2 cup of water, and whisk until the salt dissolves.

Set up the grill for indirect grilling and preheat to medium-low. If using a gas grill, place all the wood chips or chunks in a smoker box or smoker pouch and run the grill on high until you see smoke, then reduce the heat to medium-low. If using a charcoal grill, place a large drip pan in the center, preheat the grill to medium-low, then toss 1 cup of the wood chips or chunks on the coals.

When ready to cook, place the pork, skin side up, if there is one, in the center of the hot grate over the drip pan and away from the heat. Cover the grill. Cook the pork until darkly browned on the outside and very tender inside, 4 to 6 hours. To test for doneness, use an instant-read meat thermometer: The internal temperature of the pork should be about 195 degrees F. If the pork starts to brown too much (and it probably will), cover it loosely with aluminum foil, but remember that the browned bits are good, too. Every hour for the first 4 hours, swab the pork with some of the mop sauce, using a barbecue mop or basting brush. If using a charcoal grill, every hour you’ll need to add 12 fresh coals and 1/2 cup of wood chips or chunks to each side.

Transfer the pork to a cutting board, cover it loosely with aluminum foil, and let it rest for 20 minutes before pulling or chopping. Place the pork slices in an aluminum foil pan. If you are not quite ready to serve, cover the pan with aluminum foil and place it on a warm—not hot—grill or in a low oven.

If desired, brush the buns with the melted butter and lightly toast them on the grill. Load each bun with pork and slather with South Carolina Mustard Barbecue Sauce. Top with pickle slices and serve.

South Carolina Mustard BBQ Sauce

1 tablespoon butter
1 small onion, finely chopped        
1 clove garlic, minced        
1 cup Dijon mustard        
3/4 cup firmly packed brown sugar        
3/4 cup distilled white vinegar        
1 tablespoon hot sauce (preferably Crystal), or more to taste        
Coarse salt (kosher or sea) and freshly ground black pepper

Melt the butter in a heavy nonreactive saucepan over medium heat. Add the onion and garlic and cook until soft but not brown, about 3 minutes.

Stir in the mustard, brown sugar, vinegar, and hot sauce and add 1/2
cup of water. Let the sauce simmer, uncovered, until thick and richly flavored, 6 to 10 minutes. Taste for seasoning, adding more hot sauce as necessary and seasoning with salt and pepper to taste. Let the sauce cool to room temperature before serving. In the unlikely case you have any mustard sauce left, store it in a clean jar in the refrigerator. It will keep for at least a week; bring it to room temperature before using.

TIP
You could use a different sweetener, substituting honey or molasses for the brown sugar. Use 3/4 of a cup of honey. If substituting molasses, start with 3/4 of a cup, but taste for sweetness—you may need to add a little more, since molasses is not as sweet as brown sugar.


Salmon with Creamy Cucumber-Dill Salad

Grilled salmon with a tangy and refreshing cucumber salad over top makes a light and easy weeknight dinner.
Servings: 4


Ingredients

For the Salmon
  • 4 (6-oz) salmon fillets, skin on
  • 1 tablespoon extra virgin olive oil
  • kosher salt
  • freshly ground black pepper

For the Cucumber-Dill Salad

  • 1 English cucumber (also called hothouse cucumber)
  • 1/3 cup finely sliced red onion, from one small red onion
  • 1/2 teaspoon salt
  • 1/4 cup plus 2 tablespoons sour cream
  • 3 tablespoons mayonnaise, best quality such as Hellmann's or Duke's
  • 2 tablespoons white wine vinegar
  • 1/4 cup chopped fresh dill
  • 1 clove garlic, minced
  • 1/2 teaspoon sugar
  • freshly ground black pepper, to taste

Instructions

  1. Cut the cucumber in half and then slice each half down the middle lengthwise. Use the tip of a teaspoon to scoop out the center seeds. Cut each half into thin slices and place in a colander along with the red onion slices. Toss with salt and let sit in the sink for at least 30 minutes, until the water drains out.

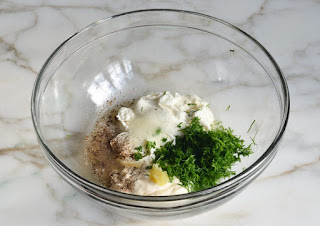
  2. In the meantime, make the dressing: combine the sour cream, mayonnaise,
    white wine vinegar, dill, garlic, sugar and black pepper in a medium bowl and mix well.

  3. When the cucumbers and onions are ready, release any excess water by tapping the colander on the base of the sink, then use a large wad of paper towels to pat the vegetables dry. Add to the dressing and toss well. Cover and chill until ready to serve.


  4. Preheat the grill to medium-high heat. Clean the grill rack, then brush lightly with oil. Close the lid and let return to temperature. Rub the salmon with olive oil and season generously with kosher salt (about 3/4 teaspoon) and pepper. Place the fillets skin side down and grill until golden brown and slightly charred, 4-5 minutes (resist the urge to peek or flip early; when fillets are nicely seared on the first side, they should release easily). Flip the fillets over and continue grilling until done, 2-3
    minutes. Let cool slightly, remove the skin if desired, and serve with the cold cucumber-dill salad piled over top or alongside.

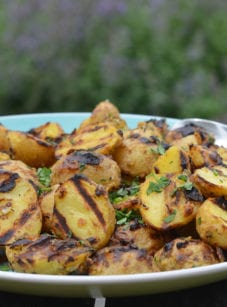
Pair with

grilled baby potatoes