Showing posts with label entree. Show all posts

Sunday, August 17, 2025

Pork Schnitzel with Garlic Sauce


INGREDIENTS

4 Harter House Pork Cutlets
1 1/2 cups all purpose flour
kosher salt and fresh ground black pepper
2 large eggs
1/2 cup milk
4 cups plain dried bread crumbs or Panko.
2 tablespoons extra virgin olive oil
2 tablespoons butter
1 sprig thyme
lemon wedges


Put the flour in a shallow dish and season with salt and pepper.  Whisk the eggs and milk in another shallow dish and season with salt and pepper.  Put the bread crumbs in a third dish and again season with salt and pepper.

Lightly dredge each piece of pork in flour, then egg, and finally the bread crumbs, pressing the bread crumbs onto the pork gently so they have a nice even coating.

Lay the breaded pork cutlets in a single layer on a plate lined with parchment and refrigerate uncovered, for 10 - 12 minutes to allow the coating to dry out a little and adhere to the pork.

Heat oil and butter in a nonstick skillet over medium high heat.  Add the thyme sprig and let it fry for about 1 minute to infuse the oil.  Remove the thyme sprig and reserve.  Gently lay the cutlets into the pan and cook until golden brown and crispy, about 3 minutes per side.  

Remove to paper towels to drain.  Season with salt and transfer to a serving platter while still hot.  Garnish with lemon wedges and the fried sprig of thyme before serving.


GARLIC SAUCE for 4 cutlets

4 Tablespoons butter
2 clove garlic
2 Lemon, juiced
Fresh Parsley or thyme

Add butter and whole garlic and heat to infuse butter.
Squeeze lemon and add parsley / thyme to the pan.  Mix well and pour over schnitzel.


PORK SCHNITZEL SANDWICH

There is not much better than this Pork sandwich.
Add your favorite sauce. provolone cheese, lettuce, tomato, and  onion, on a toasted bun.


Monday, July 7, 2025

My Favorite Chicken Fried Steak


This was always a favorite dinner at my house. 
And they are on sale this week.
Comfort food for sure.
~Shelly

Tips for the Best Chicken Fried Steak Recipe

  • There is no need to deep fry. I shallow fry to golden perfection with a cup of oil – or less. I prefer to use vegetable oil.
  • A heavy skillet works best. I use my favorite cast iron skillet but any large, heavy bottomed skillet will work.
  • Do not overcrowd the pan. Two at a time is the way to go. Preheat your oven to 225-250 F to keep it warm and crispy while you’re making the gravy.
  • Buttermilk keeps the steaks nice and tender and the TABASCO® Sauce adds loads of flavor without being overly spicy. I make mine with about 2 teaspoons but you can go up to 4 teaspoons if you want to up the ante. I like to keep it relatively calm and my family can add a couple of dashes on top if they like.
  • You’ll notice the baking soda and baking powder in the breading. This gives it a perfectly crispy coating that you won’t find in other recipes.
  • After breading the cube steaks, really press the flour in. You want the steaks to be completely coated with the breading.
  • Do not flip the steaks more than once. Wait until they are nice and golden brown before flipping. You don’t want to disturb that crunchy coating.

Don’t Forget the Gravy!

There are a few secrets to the best Chicken Fried Steak Gravy.
  1. Do NOT scrape the skillet. Leave all of that goodness in there. Simply remove the grease and add back in just enough to make the creamy gravy.
  2. Let the flour cook and brown before adding liquids. This builds up flavor and removes that raw flour taste.
  3. Slowly whisk in the milk AND cream (yes, I use a little cream in this gravy) This keeps lumps from forming and you end up with a smooth, creamy Chicken Fried Steak Gravy.
  4. Season at the end. My gravy usually doesn’t need any additional salt but I add LOTS of freshly ground black pepper.

Ingredients

Harter House tenderized cube steaks (about 1/3 lb each)  On Sale this week, July 9 - 15, 2025
1 1/2 cups all purpose flour
2 tsp fresh ground black pepper, divided
2 tsp kosher salt or sea salt, divided
1/2 tsp smoked paprika
1/2 tsp onion powder
1/2 tsp garlic powder
1/2 tsp baking soda
1/2 tsp baking powder
1 1/2 cups buttermilk
2 tsps TABASCO® Sauce (original)
2 eggs
1 cup vegetable oil

Chicken Fried Steak Gravy

  • 4 tbsp grease
  • 4 tbsp flour
  • 2 to 3 cups whole milk
  • 1/2 cup heavy whipping cream
  • salt and pepper to taste

Instructions

  • In a shallow bowl, whisk together flour, one teaspoon black pepper, one teaspoon salt, paprika, onion powder, garlic powder, baking soda, and baking powder. Set aside.
  • In a separate shallow bowl, whisk together buttermilk , TABASCO® Sauce, and eggs. Set aside.
  • Pat cube steaks dry with a paper towel, removing as much moisture as possible. Season with one teaspoon of salt and one teaspoon of pepper. Let sit for 5 minutes and pat dry again with paper towel.
  • Dredge the cube steaks in the flour mixture, shaking off excess, then dredge in the buttermilk-egg mixture, letting excess drip off, and then once again in the flour mixture, shaking off excess. 
  • Place breaded cube steaks on a sheet pan or metal rack and press any of the remaining flour mixture into the cube steaks making sure that the entire steak is completely coated. Let sit for 10 minutes.
  • Preheat oven to 225 to 250 F.
  • Meanwhile, heat vegetable oil in a heavy skillet or large cast iron skillet over medium high heat. How much oil you need depends on the size of your skillet. You want it to be about 1/4-inch deep. We aren't deep frying the steaks, just shallow frying. 
  • Test the oil by dropping a bit of the breading into in. The oil should sizzle and bubble around the breading. Look for the oil to be glistening but not smoking - about 320-340 degrees F. Now we're ready to fry.
  • Place two steaks into the pan at a time and fry for 3 to 4 minutes on each side or until golden brown. Do not flip more than once or the breading will fall off. Do not fry more than two steaks or the pan will be too crowded and the breading will fall off. 
  • Remove steaks from pan and drain on paper towels. Place in preheated oven. Turn skillet heat to medium.

Chicken Fried Steak Gravy

  • Pour the remaining grease into a heat safe bowl or glass measuring cup (I used my Pyrex). Do NOT scrape the skillet clean. We want all of those bits of yumminess to remain in the skillet so they can flavor the gravy.
  • Add back in 4 tablespoons of the grease to the hot skillet.
  • Whisk in flour and continue whisking for two to three minutes or until nice and golden brown.
  • Combine the cream and milk and slowly drizzle in about 2 1/2 cups into the skillet, whisking constantly. It might look a little crazy right at the beginning, but it will all come together.
  • Continue whisking and bring the gravy to a simmer. Cook until the gravy is smooth and creamy, about 5 to 7 minutes. If the gravy gets too thick, add in a little more milk. Season with salt and pepper to taste. (Mine didn't need any salt but LOTS of pepper!)
  • Serve chicken fried steak with gravy and mashed potatoes and your favorite green veggies. ENJOY!
This recipe from; momontimeout.com

Sunday, May 11, 2025

Italian Sausage Rigatoni Bake


This casserole combines all of our favorite Italian flavors, 
but the fresh mozzarella really sets it apart!
Serve this with a warm Ciabatta Bread


Ingredients

1 package (16 ounces) rigatoni
1 pound bulk Italian sausage
1/2 pound sliced fresh mushrooms
1 medium sweet red pepper, chopped
5 cups marinara sauce
1/4 cup grated Parmesan cheese
2 tablespoons half-and-half cream
1 pound sliced part-skim mozzarella cheese

Directions

  • Preheat oven to 375°. Cook rigatoni according to package directions; drain.
  • In a large skillet, cook sausage, mushrooms and pepper over medium-high heat until sausage is no longer pink and vegetables are tender, breaking up sausage into crumbles, 8-10 minutes; drain. Stir in marinara sauce, Parmesan cheese and cream. Add rigatoni and toss to coat.
  • In each of two greased 8-in. square baking dishes, layer one-fourth of the rigatoni mixture and one-fourth of the mozzarella cheese. Repeat layers. Bake, uncovered, until heated through and cheese is melted, 25-35 minutes. (Cover loosely with foil if tops brown too quickly.)


    Freeze option:
    Cool unbaked casseroles; cover and freeze. To use, partially thaw in refrigerator overnight. Remove from refrigerator 30 minutes before baking. Preheat oven to 375°. Bake casseroles as directed, increasing time as necessary to heat through and for a thermometer inserted in center to read 165°.

Sunday, March 23, 2025

Light Chicken Piccata


(makes 4 servings)

Ingredients
2 tablespoons flour, divided
2 tablespoon grated Parmesan Cheese
2 teaspoons olive oil
1/4 teaspoon pepper
1 tablespoon shallots, minced
1 lb boneless, skinless chicken breast cutlets
1/2 cup low-sodium chicken broth
1/2 cup dry white wine
1 tablespoon butter
3 tablespoons freshly squeezed lemon juice
3 tablespoons capers (optional)
2 tablespoons parsley, chopped
1 teaspoon tarragon

Directions

1.Whisk 2 tablespoons flour and 1 cup broth in a small bowl until smooth. Place remaining 2 tablespoons flour and the Parmesan cheese in a shallow dish. Sprinkle the chicken with 1/4 teaspoon pepper and dredge both sides in the flour. Shake to remove excess.

2.Heat the oil in a large skillet over medium heat. Add the chicken and cook until golden brown or no longer pink in the middle (2-5 minutes per side). Transfer to a plate and cover to keep warm.

3.Reduce the heat to medium-low and add the shallots and white wine, and cook until reduced by half (this should take about 1 to 2 minutes).

4.Stir in the reserved broth-flour mixture and the lemon juice. Bring to a simmer and cook, stirring until the sauce is thickened (about 5 minutes). Stir in the tarragon, parsley, butter, and capers.

5.Serve chicken with a light salad or pasta. pour sauce over chicken.

Recipe
From: 12Tomatoes.com

Sunday, January 5, 2025

Garlic Butter Baked Pork Chops with 2 sides


Garlic Butter Baked Pork chops are juicy, tender, and super flavorful thanks to the amazing butter sauce.

INGREDIENTS
2 medium sized Pork Chops
kosher salt and freshly ground pepper
4 Tablespoons butter - melted
1 Tablespoon fresh thyme - chopped
2 cloves garlic - minced
1 Tablespoon extra virgin olive oil

INSTRUCTIONS

  1. Preheat oven to 375 F.
  2. Season the pork chops with salt and pepper, and set aside.
  3. In a small bowl, mix together the butter, thyme, and garlic.  Set aside.
  4. In a cast iron skillet, heat olive oil over medium heat.
  5. When the skillet is really hot, add the pork chops.  Sear until golden, about 2 minutes per side.
  6. Pour garlic butter mixture over the pork chops.
  7. Place the skillet in the oven, and cook until the pork chops reach an internal temperature of 145 F, about 10-12 minutes.  The time depends on the thickness of the pork chops.*
  8. Remove from the oven.  Using a spoon, pour some of the butter sauce left in the skillet onto the pork chops before serving.

*  Insert the thermometer into the thickest part of the pork chop.


CRISPY ROASTED GREEN BEANS

INGREDIENTS
2 pounds green beans - trimmed
4 teaspoons extra virgin olive oil
1 teaspoon Italian seasoning
1/2 teaspoon garlic powder
1/2 teaspoon crushed red pepper
salt and fresh ground pepper

INSTRUCTIONS

  1. Preheat oven to 425 F
  2. Place a baking sheet in the oven for 10 minutes
  3. In a medium bowl, place the green beans and all the remaining ingredients.
  4. Mix well.
  5. Arrange the seasoned green beans in a single layer on the preheated baking sheet.
  6. Bake for about 8 minutes or until crisp tender.


ROASTED BUTTERNUT SQUASH MASH

INGREDIENTS
1 butternut squash
2 Tablespoons extra virgin olive oil
3 gloves garlic - minced
4 Tablespoons butter
Salt and black pepper
cayenne pepper for garnish

INSTRUCTIONS

  1. Preheat oven to 400 F
  2. Line a baking sheet with parchment paper or aluminum foil.  Set aside
  3. Wash and cut the butternut squash in half lengthwise.  Using a spoon, scoop out the seeds.
  4. Place both halves face up on the prepared baking sheet.
  5. Drizzle with olive oil and season with salt, pepper, and garlic.
  6. Roast in the oven for 45 - 60 minutes until fork tender.
  7. Remove the squash from the oven, and let cool for about 5 minutes.
  8. Using a large spoon, remove all of the squash flesh from the skin, and place it into a bowl for mashing.
  9. Add the butter, sea salt and pepper, and mash well until fluffy and smooth.  I like to use a hand mixer.
  10. Sprinkle with cayenne pepper and butter for extra flavor before serving.


Sunday, June 23, 2024

Shrimp Scampi with Linguini


Do you ever think of recipes as a guideline?

I wanted Shrimp Scampi. 
I had the shrimp but was missing some other ingredients.
I used spaghetti instead of linguini.
I used chicken broth instead of white wine.  Imagine me not having wine.  But, I guess it happens.
I did not have shallots so I used diced onion.
I did not have garlic on hand. Another unbelievable occurrence. So I used garlic powder.
And I did not have a lemon, but I did have a squeeze lemon juice.
And I did not have parsley on hand.

All this to say that it was still wonderful.

INGREDIENTS

1 lb. Linguini or spaghetti
4 Tablespoons Butter
4 Tablespoons Extra-Virgin olive oil, plus more for drizzling
2 shallots, finely chopped
2 cloves of garlic, minced
pinch red pepper flakes, optional
1 pound shrimp, peeled and deveined
Kosher salt and freshly ground pepper
1/2 cup dry white wine or broth
Juice of one lemon
1/4 cup finely chopped parsley leaves


DIRECTIONS

Cook Pasta al dente, as directed on the package

Meanwhile, in a large skillet, melt 2 tablespoons butter in 2 tablespoons olive over medium-high heat.  Saute shallots, garlic red pepper flakes, until the shallots are translucent, 3-4 minutes.  Season the shrimp with salt and pepper, add them to the pan until they turn pink, about 2-3 minutes.  Remove the shrimp from the pan and keep warm.  Add wine and lemon juice and bring to a boil.  Add 2 tablespoons butter and 2 tablespoons olive oil.  When butter is melted, return the shrimp to the pan with the parsley and cooked pasta.  Stir well and season with salt and pepper.  Drizzle over a bit more olive oil and serve immediately. 


Sunday, April 7, 2024

Juicy Pork Tenderloin with Peppers and Onions


PREP
COOK
TOTAL
The trick to the best pork tenderloin is to sear the pork on all sides before roasting. In our recipe, the pork is browned on all sides and then baked on top a bed of onions and peppers. Most often, you will find pork tenderloins sold in packages with two tenderloins. One tenderloin should generously serve two people and will most likely serve three. One note, “pork tenderloins” and “pork loin” are two different cuts of meat. Pork tenderloins are much smaller and take less time to cook.
Makes 6 servings


You Will Need


2 pork tenderloins (about 1 1/2-pounds each)
1 tablespoon vegetable oil
1 tablespoon butter
2 medium onions, sliced
3 bell peppers, sliced
1 tablespoon minced garlic cloves (3 cloves)
1 tablespoon whole ground mustard or Dijon mustard
1 tablespoon chopped fresh thyme leaves
Salt and fresh ground pepper

Directions

Prepare Pork
Heat oven to 425 degrees F.
Trim each tenderloin of any silver skin (this can be tough when cooked). To do this, use a small sharp knife and slide the blade under and outward to remove it.
Pat pork dry with paper towels, and then season on all sides with one teaspoon of salt.
Heat the oil in a heavy-bottomed oven-safe skillet over medium heat. When the oil is hot and shimmers, add the pork tenderloins and cook, turning every few minutes, until evenly browned all over; 10 to 12 minutes. Transfer to a large plate or cutting board. (The pork will not be cooked through).

Prepare Peppers and Onions
Keep the pan used to sear the pork on the stove over medium heat. Add the butter. When the butter is melted and bubbling, stir in the onions then cook, stirring often, until they start to soften, about 5 minutes. Stir in the bell peppers, garlic, one teaspoon of thyme, and 1/4 teaspoon of salt. Cook, stirring every minute or so, for 5 more minutes.

To Finish
Use a pastry brush (or use your fingers) to rub the seared pork all over with the mustard, two teaspoons of thyme, and a generous amount of black pepper (1/4 to 1/2 teaspoon).

Place the seared pork tenderloins on top of the onions and bell peppers, and then slide the pan into the oven. Roast 15 to 20 minutes or until an internal thermometer inserted into the thickest part registers 145 degrees F. Transfer the pork to a large plate and cover with aluminum foil. Let rest about 5 minutes.

To serve, slice pork into 1-inch slices then serve on top of the onions and peppers.

Adam and Joanne's Tips

  • You need a large oven-safe skillet for this recipe. If you do not have one, you can brown the pork and partially cook the onions and peppers on the stove. Then, transfer the peppers and onions to a baking dish and place the pork on top.
  • Substitute the fresh thyme with 1 teaspoon of dried thyme.
  • Pork tenderloin doneness: We cook our pork to 145 degrees F. This means the pork will be barely pink in the middle, safe to eat, and ultra juicy. You can cook pork tenderloin to anywhere between 145 degrees F and 160 degrees F. Just keep in mind that keeping it as close to 145 degrees F will result in the juiciest, most tender piece of meat.


Monday, July 3, 2023

Chopped Sirloin in Mushroom Gravy


This recipe comes from my very good friend, Judy.  She probably makes this weekly. I love it too.
It always smells so good while it's cooking.

Ingredients

2 Chopped Sirloin Fillets from Harter House
Olive oil
1 Pkg.  Sliced Mushrooms
1 Can Campbell’s Golden Mushroom Soup
Salt & Pepper – not too much salt
Red Bell Pepper – cut in strips (optional)
Onion (optional)
Beef Broth – if additional liquid is needed

Optional
Baby Carrots & Potatoes can be added for last 20-30 minutes.

Drizzle Olive oil in a Pyrex or Corning dish.
Flatten Sirloin Fillets just a little.
Place uncooked Sirloin Fillets in dish. 
Salt and Pepper meat.
Top with golden mushroom soup – undiluted – Plenty on top.
Top with sliced mushrooms.


Cook, Covered, in a 350 degree oven for 1 hour.  Check liquid in dish after 30-40 minutes.
Optional Baby Carrots & Potatoes can be added for last 20-30 minutes.

I like mashed potatoes with this meal too.


Tuesday, April 27, 2021

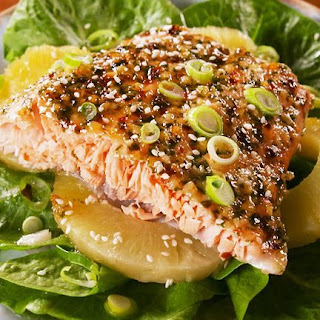
Baked Pineapple Salmon

This recipe comes from Delish.com.
I have made this recipe and I really liked it.  Of course, I really like salmon


Ingredients

Cooking spray, for pan
17 pineapple rings, fresh or canned 
1 large salmon fillet (about 3 lbs.) 
Kosher salt
Freshly ground black pepper
3 tbsp. melted butter
3 tbsp. sweet chili sauce
2 tbsp. freshly chopped cilantro
3 cloves garlic, minced
2 tsp. freshly grated ginger
2 tsp. toasted sesame oil
1/2 tsp. crushed red pepper flakes
Toasted sesame seeds, for garnish
Thinly sliced green onions, for garnish
Lime wedges, for serving


Directions
  1. Preheat oven to 350°. Line a large rimmed baking sheet with foil and grease with cooking spray. In the center of the foil, lay pineapple slices in an even layer.

  2. Season both sides of the salmon with salt and pepper and place on top of pineapple slices.

  3. In a small bowl, whisk together butter, chili sauce, cilantro, garlic, ginger, sesame oil, and red pepper flakes. Brush all over salmon fillet.

  4. Bake until the salmon is cooked through, about 25 minutes. Switch the oven to broil, and broil for 2 minutes, or until fish is slightly golden. Garnish with sesame seeds and green onions and serve with lime wedges.


Monday, November 16, 2020

Chardonnay paired with Chicken Makhani (Indian Butter Chicken)

Chardonnays have become very popular.

It is unmistakable in the mouth because of its impeccable sugar/acid balance, its full body, and its easy smoothness. Its aroma is distinct, yet delicate. 

Chardonnay grapes are relatively resilient and are able to survive in a variety of environments. It is used in so many different places to produce so many different wines because the Chardonnay grapes themselves are relatively neutral in flavor. Most of their flavor is derived first from the conditions in which the grapes are grown and second from the conditions of the wine production. This makes it easier for different wineries to produce distinctly different Chardonnay wines.

Typical Chardonnay characteristics include; Lemon, Apple, Tropical Fruit, Melon, Pineapple, and Mango. 

Oaked Chardonnays can display characteristics like; Smoke, Vanilla, Spice, Toast, Nuts, Butterscotch, Caramel, Coconut, Cloves and Cinnamon. 

Unoaked or less heavily oaked Chardonnays tend to have lighter, delicate flavors which can be matched with a fairly wide variety of dishes. There are some foods which tend to go better than average with Chardonnay such as Chicken, Turkey, Fish, Pork and mushrooms. 

More heavily oaked Chardonnays go poorly with delicate dishes, like fish, but pair well with Japanese Cuisine, Chinese Cuisine, Spicy Dishes and Smoked Fish.

Harter House World Flavors offers a wide variety of Chardonnay’s. Of course , my favorite is La Crema, an exquisite Chardonnay.


Chicken Makhani (Indian Butter Chicken) 

1 tablespoon peanut oil 
1 red onion, finely chopped 
1/4 white onion, chopped 
2 tablespoons butter 
2 teaspoons lemon juice
1 tablespoon ginger-garlic paste 
1 teaspoon garam masala 
1 teaspoon chili powder 
1 teaspoon ground cumin 
1 bay leaf o 1/4 cup plain yogurt 
1 cup cream o 1 cup tomato puree 
1/4 teaspoon cayenne pepper, to taste 
1 pinch salt 
1 pinch black pepper 
1 tablespoon peanut oil 
1 lb boneless skinless chicken thighs cut into bite size pieces 
1 teaspoon garam masala 
1 pinch cayenne pepper 
1 tablespoon cornstarch 
1/4 cup water 

Directions: 
Heat 1 tablespoon oil in a large saucepan over medium high heat. 
Saute shallot and onion until soft and translucent. 
Stir in butter, lemon juice, ginger garlic paste, 1 teaspoon garam masala, chili powder, cumin and bay leaf. 
Cook, stirring, for 1 minute. 
Add tomato puree and cook for 2 minutes, stirring frequently. 
Stir in half-and-half and yogurt. 
Reduce heat to low and simmer for 10 minutes, stirring frequently. 
Season with salt, pepper and cayenne. 
Remove from heat and set aside. 
Heat 1 tablespoon oil in a large heavy skillet over medium heat. 
Cook chicken until lightly browned, about 10 minutes. 
Reduce heat and season with 1 teaspoon garam masala and cayenne. 
Stir in about 1/3 of the sauce and simmer until liquid has reduced and chicken is no longer pink, about 5 minutes. 
Pour the rest of the sauce into the chicken. Mix together cornstarch and water, then stir into the sauce. Cook for 5 to 10 minutes.

Monday, September 7, 2020

Ground Beef Enchiladas


These Ground Beef Enchiladas are so tasty and easy, you’ll never go back to canned enchilada sauce. Corn tortillas filled with flavorful ground beef, melty cheese and a killer homemade red enchilada sauce.

This beef enchilada recipe is really so simple, that you might have all the ingredients you need already on hand. Start with a pound of extra lean good quality ground beef. I prefer to sauté the onions and jalapeños, then add the garlic just before adding the ground beef. This brings out the flavors of the aromatics. A small amount of sugar balances the acidity of the tomato sauce.


How to Make Beef Enchiladas – Time Saving Tip!


Prepare as much as you can ahead, dice and shred and have everything laid out. Once you have everything prepared, set up an assembly line to make the enchiladas. In this enchilada recipe, the beef and sauce is cooked together in one pot. For assembly, rather than separating the meat and the enchilada sauce, I use a slotted spoon to spoon the meat mixture into each tortilla, then top with cheese and roll. Once the beef has been evenly divided into the tortillas, use the remaining sauce in the pan to top the enchiladas and bake.


Good Quality Spices and Fresh Herbs

I love the flavor of cilantro, but if you don’t you can certainly skip it. For freshness, try chopped fresh parsley instead. I also like the extra flavor of smoked paprika in this recipe, but you can substitute regular paprika as well.


Frying the Tortillas for Enchiladas

In a small frying pan, lightly fry tortillas in a shallow amount of vegetable or canola oil. You just want the tortillas to be soft and pliable, not crispy. Lightly frying the corn tortillas prevents them from getting soggy once you bake the enchiladas. The oil acts as a barrier and keeps tortillas from absorbing too much liquid from the sauce.


Beef Enchiladas Recipe

The best part of this recipe is that it’s easily doubled or tripled. It’s a great dinner to make and take. Make one for home and one for a friend or neighbor. These beef enchiladas freeze really well too! Just assemble, let cool completely, cover tightly and freeze.


Ingredients
  • 1 tablespoon vegetable oil plus additional for frying tortillas
  • 1/2 cup onion finely diced
  • 1 jalapeno minced and seeds removed
  • 4 cloves garlic minced
  • 1 pound 93/7 lean ground beef
  • 1 cup beef broth low sodium
  • 2 8 oz cans tomato sauce good quality
  • 2 tablespoons chili powder
  • 1 teaspoon smoked paprika
  • 1 tablespoon sugar
  • 1 teaspoon cumin
  • 1 teaspoon kosher salt
  • 1/2 teaspoon freshly ground black pepper
  • 2 tablespoons cilantro chopped
  • 12 corn tortillas
  • 16 oz Colby-jack cheese shredded
  • sour cream for serving
Instructions
  1. In a large skillet, sauté onions and jalapeño over medium low heat until onions start to soften and turn translucent, 2-3 minutes. Stir in garlic and cook 1 minute more. Increase heat and add ground beef to skillet and brown until cooked through. Add beef broth, tomato sauce, chili powder, sugar, cumin, salt and pepper to pan and stir to combine. Let simmer over low heat for 10 minutes or until sauce has reduced slightly. 
  2. Meanwhile in a second smaller skillet, lightly fry corn tortillas in hot vegetable oil. Tortillas should still be pliable for rolling. Set tortillas aside with paper towels between each layer. Once sauce has reduced slightly, stir in 2 tablespoons of chopped fresh cilantro.
  3. Preheat oven to 400 degrees and spray a 9x13 baking dish with non stick cooking spray.
  4. To assemble enchiladas, start by adding 1/2 cup of enchilada sauce mixture in bottom of baking pan. Use a slotted spoon to evenly divide meat mixture into each of the tortillas, then divide 8 oz of cheese between all 12 enchiladas, roll and place seam side down in baking dish. Pour remaining enchilada sauce over rolled enchiladas and top with remaining cheese.
  5. Cover dish with foil and bake at 400 degrees for 20-30 minutes, or until heated through and hot and bubbly. Sprinkle with additional fresh cilantro and serve with sour cream.


This recipe comes from Melissa at;

Monday, August 10, 2020

Salmon with Creamy Cucumber-Dill Salad

Grilled salmon with a tangy and refreshing cucumber salad over top makes a light and easy weeknight dinner.
Servings: 4


Ingredients

For the Salmon
  • 4 (6-oz) salmon fillets, skin on
  • 1 tablespoon extra virgin olive oil
  • kosher salt
  • freshly ground black pepper

For the Cucumber-Dill Salad

  • 1 English cucumber (also called hothouse cucumber)
  • 1/3 cup finely sliced red onion, from one small red onion
  • 1/2 teaspoon salt
  • 1/4 cup plus 2 tablespoons sour cream
  • 3 tablespoons mayonnaise, best quality such as Hellmann's or Duke's
  • 2 tablespoons white wine vinegar
  • 1/4 cup chopped fresh dill
  • 1 clove garlic, minced
  • 1/2 teaspoon sugar
  • freshly ground black pepper, to taste

Instructions

  1. Cut the cucumber in half and then slice each half down the middle lengthwise. Use the tip of a teaspoon to scoop out the center seeds. Cut each half into thin slices and place in a colander along with the red onion slices. Toss with salt and let sit in the sink for at least 30 minutes, until the water drains out.

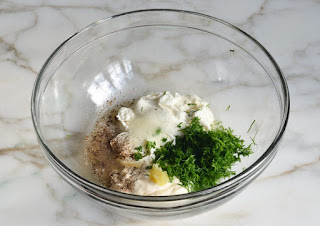
  2. In the meantime, make the dressing: combine the sour cream, mayonnaise,
    white wine vinegar, dill, garlic, sugar and black pepper in a medium bowl and mix well.

  3. When the cucumbers and onions are ready, release any excess water by tapping the colander on the base of the sink, then use a large wad of paper towels to pat the vegetables dry. Add to the dressing and toss well. Cover and chill until ready to serve.


  4. Preheat the grill to medium-high heat. Clean the grill rack, then brush lightly with oil. Close the lid and let return to temperature. Rub the salmon with olive oil and season generously with kosher salt (about 3/4 teaspoon) and pepper. Place the fillets skin side down and grill until golden brown and slightly charred, 4-5 minutes (resist the urge to peek or flip early; when fillets are nicely seared on the first side, they should release easily). Flip the fillets over and continue grilling until done, 2-3
    minutes. Let cool slightly, remove the skin if desired, and serve with the cold cucumber-dill salad piled over top or alongside.

Pair with

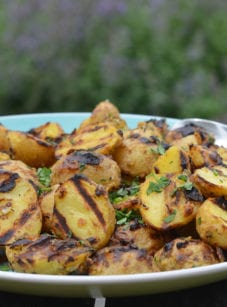
grilled baby potatoes

Tuesday, June 23, 2020

Ribs, Sauerkraut, Mashed Potatoes and Brown Gravy


My mother invited me to dinner this week, with my Aunt Sally and her husband, Mike..
Mother made a classic German / Bohemian dish of Pork, Sauerkraut, mashed potatoes and brown gravy.  It was so good, I want to prepare it again today.  (There wasn't any leftover at her house)
The secret ingredient is caraway seed.  In our family, we love recipes with caraway.

This time my mother used Baby Back Ribs.
In the past she has used spare ribs, and country style ribs.


INGREDIENTS
1 slab Baby Back Ribs - Membrane removed
salt, pepper,
Cavender's Greek Seasoning
1 Bag Flanagan's Krrrrisp Kraut, drained
1 Tablespoons Caraway Seed

Serve with Mashed Potatoes and (McCormick's) Brown Gravy.


DIRECTIONS
In a 9 x 9 baking dish, place seasoned ribs on the bottom.
Top with drained Sauerkraut,
Sprinkle with Caraway seeds.
Cook in a 350 degree oven for 2 1/2 - 3 hours.
(Meat will fall off the bone)

NOTE
You can also Par-boiled the ribs for about 30 minutes and then reduce the bake time to 1 hour.


Removing the Membrane from Baby Back Ribs
  1. At one end of the rack, slide a dinner knife under the membrane and over a bone.
  2. Lift and loosen the membrane until it tears.
  3. Grab the edge of the membrane with a paper towel and pull it off.
  4. The membrane may come off in one whole piece, or you may need to remove it in smaller pieces.
An interesting fact, when I purchased my Baby Back ribs at Harter House today, the butcher told me they are purchasing ribs with the membrane already removed.  Yay!.  Now I won't forget to remove it.
Harter House also sells a 3-slab Value Pack.  I was told, those may still have the membranes.


Flanagan Kraut is my favorite.
Find it in the Deli Case at Harter House.


I used the regular Cavender's, but they also have a Salt Free Cavender's Seasoning that does not contain MSG. Ingredients: Potassium chloride, black pepper, corn starch, garlic, oregano, flavor base seasoning (Hydrolyzed corn soy protein, sugar, onion powder, spice extractives), parsley and five other spices.


Everyone always enjoys this simple, 
easy to prepare, brown gravy packet.

Just add 1 Cup Water per packet.
I used 2 packets. 


ENJOY


Tuesday, June 9, 2020

Honey Garlic Salmon


Salmon

The browned butter mixed through that honey garlic sauce is what makes that salmon recipe stand out from the rest. 

Pan Seared Salmon

This salmon gets cooked right in the sauce. There’s no searing or frying first. Why? Because a lot of people get anxiety at the thought of frying then flipping salmon and having the fillets fall apart on them halfway through cooking. 

Q. But how do I get the same crispy edges from searing? A. Once the salmon is half way done, you’re going to broil your fillets for a couple more minutes for that extra golden, crispy and caramelized finish.


For a stronger lemon flavored salmon, add the wedges into the pan when your sauce is bubbling 
(the peel provides all of the flavor this way). For a milder flavor, leave them out. 
Make this Easy Honey Garlic Salmon for your dinner table tonight!


Ingredients

  • 4 fresh salmon fillets about 1/2 pound each, skin off or on
  • Salt and pepper, to season
  • 1/2 teaspoon paprika (mild, sweet or smokey)
  • 2 tablespoons butter
  • 4 cloves garlic, finely chopped or minced
  • 4 tablespoons honey
  • 1 tablespoon water
  • 2 teaspoons soy sauce
  • 1 tablespoon fresh squeezed lemon juice, (plus extra to serve)
  • Lemon wedges to serve

Instructions

  • Arrange oven shelf to the middle of your oven. Preheat oven to broil/grill settings on medium heat. 
  • Season salmon with salt, pepper and paprika. Set aside.
  • Heat the butter in a skillet or pan over medium-high heat until melted. Add the garlic and sauté for about a minute, until fragrant. Pour in the honey, water and soy sauce; allow the flavors to heat through and combine. Add in the lemon juice; stir well to combine all of the flavors together.
  • Add the salmon steaks to the sauce in the pan; cook each fillet (skin-side down if there's any skin) for 3-4 minutes or until golden, while basting the tops with the pan juices. Season with salt and pepper, to taste (if desired).
  • Optional -- Add the lemon wedges around the salmon (adds a stronger lemon taste). 
    Baste salmon one more time then transfer the pan to your oven to broil / grill for a further 5-6 minutes, or until the tops of the salmon are nicely charred, and the salmon is cooked to your liking.
  • To serve, drizzle with the sauce and a squeeze of lemon juice. Serve with steamed vegetables; over rice or with a salad.

FROM;
Cafedelights.com

Monday, June 10, 2019

Slow Cooker Balsamic Glazed Chuck Roast


Moist and fall apart tender beef chuck roast in a tasty balsamic glaze that is so easy to make in the slow cooker!


INGREDIENTS
1 tablespoon oil
3 pounds Harter House Chuck Roast
1 large onion, sliced
4 cloves garlic, chopped
1/2 teaspoon red pepper flakes
1 cup beef broth
1/2 cup balsamic vinegar
2 tablespoons soy sauce (or tamari)
2 tablespoons brown sugar
1 tablespoon Worcestershire sauce
1 pound baby carrots (optional)
1 pound mini potatoes or diced potatoes (optional)
2 tablespoons cornstarch + 2 tablespoons water

DIRECTIONS
Heat the oil in a large pan over medium-high heat, add the beef and brown on all sides, about 20 minutes and set aside.
Add the onions and cook until tender, about 2-3 minutes, before adding the garlic and red pepper flakes and cooking until fragrant, about a minute.
Place the beef, onions, broth, balsamic vinegar, soy sauce, brown sugar, Worcestershire sauce, carrots and potatoes in a slow cooker, cover and cook on low for 8-10 hours or on high for 3-5 hours. (The beef will be falling apart tender when done!)
Remove the carrots, potatoes and beef and slice or shred the beef.

Skim any fat from the cooking juices, place it in a sauce pan, bring to a simmer, add the mixture of the cornstarch and water and cook until the glaze has thickened a bit.

OPTION
Skip the first 2 steps and place everything into the slow cooker.

OPTION
Instead of using the crock pot, place additional ingredients in the pot you cooked the meat in, bring to a boil, reduce the heat, simmer,  and cook until meat is pull apart tender, about 3-4 hours 
OR transfer the pot to a 275 F oven and braise until the meat is pull apart tender, about 3-4 hours.


Recipe from Closetcooking.com