Showing posts with label entrée. Show all posts

Sunday, May 4, 2025

CARBONARA WITH PAN SEARED SCALLOPS


Ingredients for Carbonara
8 slices of Harter House thick cut bacon diced
1 shallot finely sliced
1 clove garlic (leave whole)
4 green onions
2 egg yolks
½ cup cream
1 cup Parmigiano Reggiano, grated
fresh ground pepper
pasta of your choice (I used Linguine, but most recipes use Spaghetti)

Instructions
Pasta Carbonara
Start cooking pasta in large stainless steel pot.
In small bowl mix together cream, egg yolks and ¾ of cheese.
In large skillet cook bacon until crisp, add shallots and ½ green Onions.
Smash down garlic clove a bit, add to bacon. (remove prior to adding pasta)
When pasta is finished cooking, drain well, then add to skillet of bacon.
Toss well, then transfer to large bowl.
Add cream mixture to pasta and combined well. Make sure pasta is still hot in order to cook the eggs and melt the cheese.
Arrange pasta on plate, top with seared scallops, add some fresh ground pepper, grated parmesan, and green onions.

Perfect Pan Seared Scallops - I use 4-5 Scallops per person.

Blot scallops with paper towel to remove any water. Salt and pepper.
Heat large cast iron frying pan, add 2 tablespoons olive oil.
Make sure frying pan is hot before adding scallops but not smoking.
Add scallops leaving plenty of space between. Overcrowding the pan will drop the pan temperature and cause scallops to steam rather than sear. (may have to do in batches)
Sear for about 2-4 minutes or when bottom is a nice golden brown. Don't move them around in the pan or you will prevent them from forming that nice brown crust. After a couple of minutes have peek under to see if golden brown.
Turn to sear other side. (about 1-3 more minutes)
Add 2 tablespoons of butter to pan now.
Spoon the melted butter over the scallops as the other side finishes cooking.
Transfer to paper towel covered plate.
Keep warm in oven, if making in batches.


Sunday, February 16, 2025

Roasted Butternut Squash Soup


This homemade butternut squash soup is the best I’ve ever tasted! This recipe is super creamy (yet cream-less) and full of delicious butternut flavor. Leftover soup tastes even better the next day. Recipe yields about 4 bowls or 6 cups of soup.

Ingredients

  • 1 large butternut squash (about 3 pounds), halved vertically and seeded
  • 1 tablespoon olive oil, plus more for drizzling
  • ½ cup chopped shallot (about 1 large shallot bulb)
  • 1 teaspoon salt
  • 4 garlic cloves, pressed or minced
  • 1 teaspoon maple syrup
  • ⅛ teaspoon ground nutmeg
  • Freshly ground black pepper, to taste
  • Up to 4 cups (32 ounces) vegetable broth
  • 1 to 2 tablespoons butter, to taste (substitute olive oil for dairy free/vegan soup)

Instructions

  1. Preheat the oven to 425 degrees Fahrenheit and line a rimmed baking sheet with parchment paper. Place the butternut squash on the pan and drizzle each half with just enough olive oil to lightly coat the squash on the inside (about 1 teaspoon each). Rub the oil over the inside of the squash and sprinkle it with salt and pepper.
  2. Turn the squash face down and roast until it is tender and completely cooked through, about 45 to 50 minutes. Set the squash aside until it’s cool enough to handle, about 10 minutes. Then use a large spoon to scoop the butternut squash flesh into a bowl and discard the tough skin.
  3. Meanwhile, in a medium skillet (or large soup pot, if you’ll be serving soup from that pot), warm 1 tablespoon olive oil over medium heat until shimmering. Add the chopped shallot and 1 teaspoon salt. Cook, stirring often, until the shallot has softened and is starting to turn golden on the edges, about 3 to 4 minutes. Add the garlic and cook until fragrant, about 1 minute, stirring frequently.
  4. Transfer the cooked shallot and garlic to your blender. Add the reserved butternut, maple syrup, nutmeg and a few twists of freshly ground black pepper. Pour in 3 cups vegetable broth, being careful not to fill the container past the maximum fill line (you can work in batches if necessary, and stir in any remaining broth later).
  5. If you would like to thin out your soup a bit more, stir in the remaining cup of broth (I used the full 4 cups, but if you used a small squash, you might want to leave it as is). Add 1 to 2 tablespoons butter or olive oil, to taste, and blend well. Taste and stir in more salt and pepper, if necessary.
  6. Serve immediately (I like to top each bowl with a little more black pepper). Let leftover soup cool completely before transferring it to a proper storage container and refrigerating it for up to 4 days (leftovers taste even better the next day!). Or, freeze this soup for up to 3 months.

Garnish and Variations

Classic garnishes for Butternut Squash Soup include a dollop of sour cream, plain yogurt, or crème fraiche.  A sprinkle of minced cilantro or thyme is also tasty.

  • Creamy - Add 1/3 to 1/2 cup heavy cream after blending and gently heat until warmed through.
  • Spicy - Add 1 chopped jalapeno and 1/4 tsp. cayenne with the garlic.  Stir in up to 1/4 cup brown sugar at the end.  If you like, cream is also a nice addition to this version.
  • Roasted - Roasting concentrates the flavor of the vegetables.  You can use this method with any of the other flavor combinations you like.  Put halved and seeded Squash cut-side down in a large pan.  Arrange halved and peeled onion and garlic around the squash.  Pour in 1 cup of broth and roast in a 375 F Oven until very tender, about 30 minutes.  Let cool slightly.  Scoop out the squash flesh from the peel and put in a blender, along with the onions, garlic, and remaining broth.
  • Gingery - Add 1 tablespoon grated fresh ginger and 1 teaspoon ground ginger along with the garlic.  Make it even gingery-er by melting 4 tablespoons butter in a small frying pan.  Cook until it turns light brown and add 1 tablespoon grated fresh ginger.  Swirl the ginger butter on top of each serving.
  • Warm Spices - Add a combination of 1/4 teaspoon each ground cloves, cardamon, nutmeg, ground ginger, cinnamon, and/or black pepper along with the garlic.
  • Many Squash - Switch out up to 2 lbs. of the butternut squash with acorn squash.
  • Protein Packed - Whirl up to 8 oz. of soft or silken tofu into the soup.  Be sure to whirl it in the blender or food processor for a full minute or so to fully incorporate the tofu.


Sunday, May 5, 2024

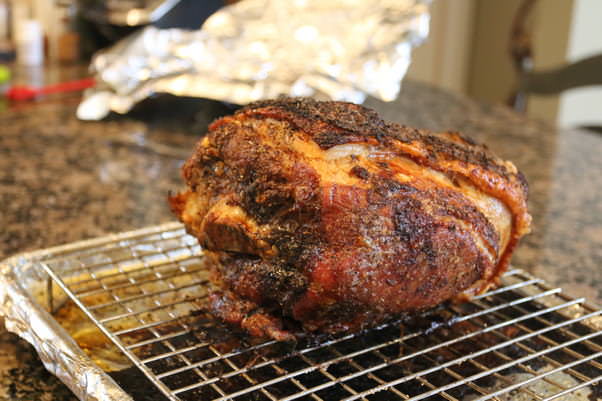
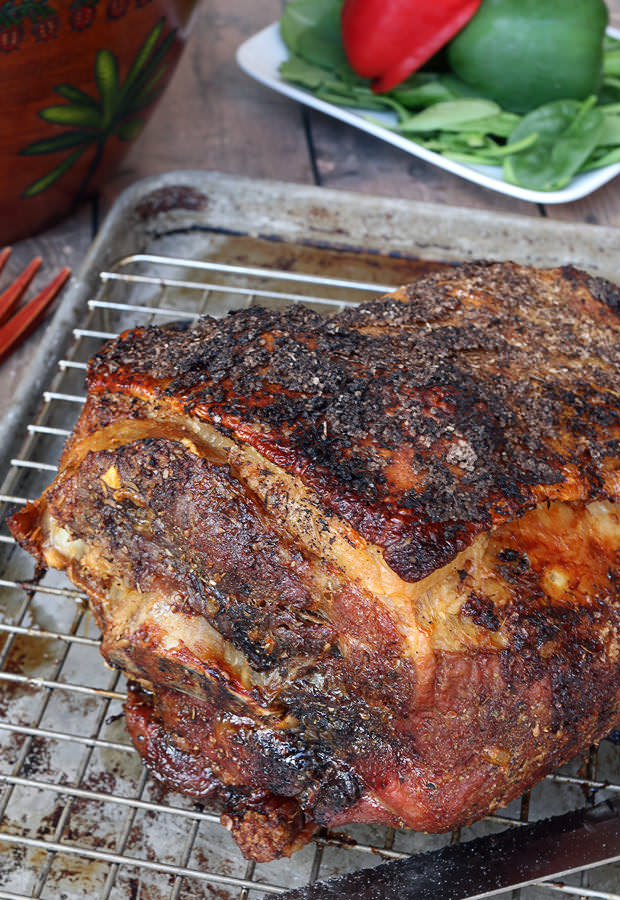
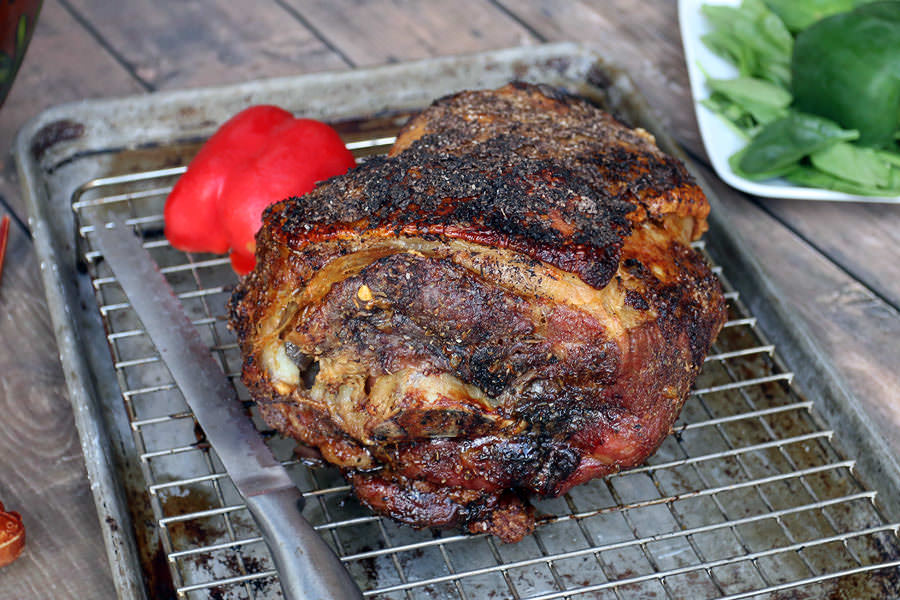
Crispy Skin Slow Roasted Pork Shoulder


I will put this roast in the oven and enjoy the aroma ALL DAY LONG!


PorkShoulderLong1
I grew up on this roast.  My family is German and Bohemian, and we always put Caraway Seed on it, and served it with sauerkraut, potato dumplings, and a brown gravy made from the roast drippings.  If you're interested, the recipe, Pork, Sauerkraut & Dumplings, is in our first Harter House Cookbook.

I bet, it’ll feed your entire family for a few days! 

It makes the best Pulled Pork and it's just plain delicious. 

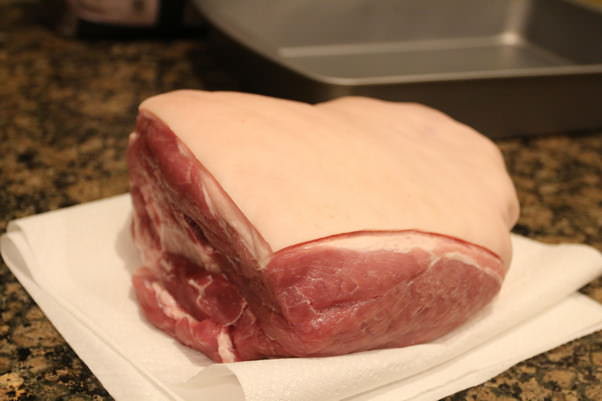
There are 2 parts of the pork shoulder – the Picnic Roast (what we’re using) and Boston Butt (which comes from the upper part of the shoulder).

The Picnic roast will have meaty chunks of pork that we can literally pull apart with our fingers. It does take a little extra cooking time, and a little more patience  - and a really great value.

When you purchase a fresh picnic at Harter House, it is usually frozen. (Fresh meaning not cured, as in a ham) I have learned that if I put the roast in the oven frozen, at 350 degrees for 7-8 hours, it turns our perfect and the skin is ALWAYS crispy.


The following recipe comes from ruled.me  blog.
"This recipe cooks the roast from a thawed state, at a lower temperature, for a longer period of time.
Since I am a huge fan of the crispy skin, I have always cooked the roast from the frozen state to ensure the crispy skin."  ~Shelly

8 lbs. Pork Shoulder (bone-in, skin-on)
3 1/2 tbsp. Salt
2 tsp. Oregano
1 tsp. Black Pepper
1 tsp. Garlic Powder
1 tsp. Onion Powder
1. Completely wash and pat dry the pork. Leave on the counter-top for 2-3 hours to come to room temperature.

IMG_5388

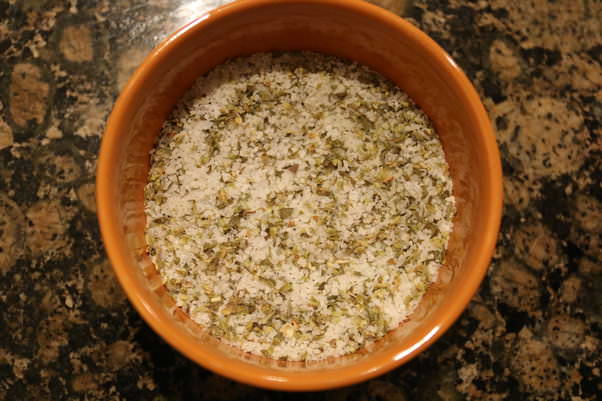
2. Once the pork has been dried and is coming to room temperature (after a few hours), preheat your oven to 250F. Mix together all of the spices in a bowl.

IMG_5384

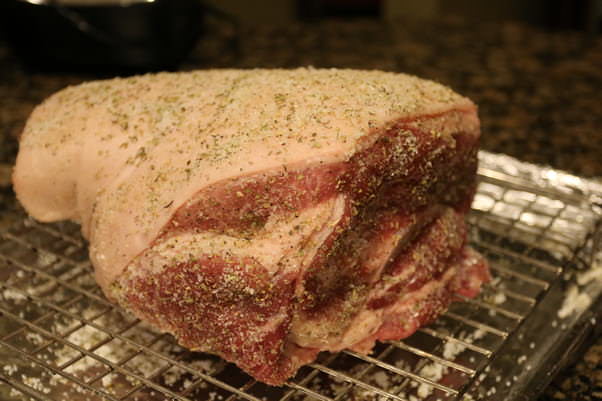
3. Starting skin side down, pat the salt rub all over the pork to completely cover it. Once the bottom is done, flip and place on a wire rack that’s sitting over a baking sheet covered in foil. Spread the rub on all sides and top of the pork.

IMG_5396

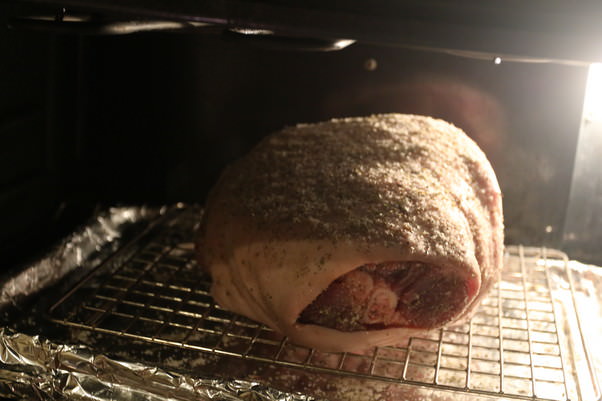
4. Once your oven is preheated and pork rubbed, place into the oven and bake for anywhere between 8-10 hours. I did 10 hours for my 8 lb. roast, but if you have smaller sizes or bigger sizes, you will have to adjust accordingly. You essentially want the internal temperature to be about 190F.

IMG_5398

5. Remove the pork from the oven and cover with foil. Allow the pork to rest for 15 total minutes. Preheat oven to 500F.

IMG_5405

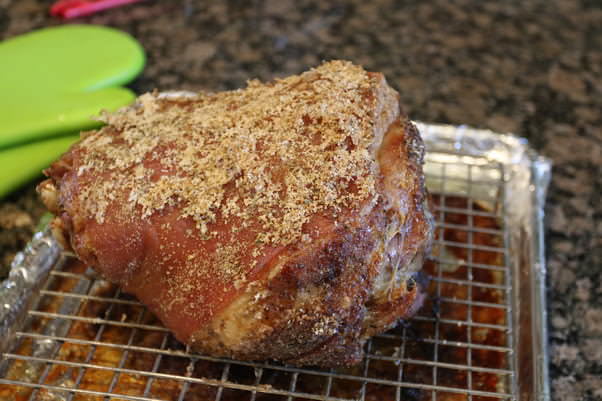
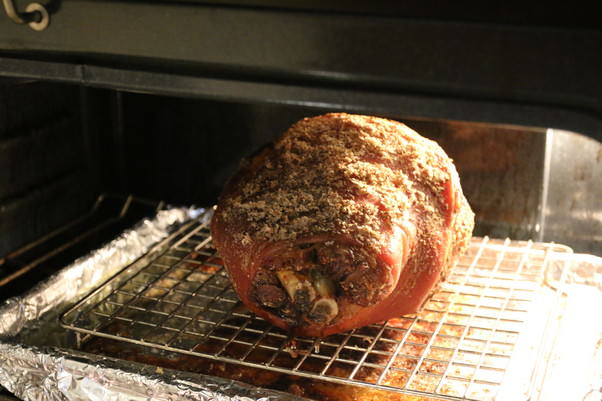
6. Once pork is rested and oven heated to  500 F, remove the foil tent from the pork and place into the oven. We will rotate the pork every 5 minutes to allow for even cooking of the skin (YAY CRACKLINS’). There may be smoke that comes out of your oven during this process due to the fat that dripped off during the roasting time. You can either open the window or remove this fat previous to putting into the oven.

IMG_5421

7. Take the pork out of the oven and let rest for 15-20 minutes before slicing/digging in.

IMG_5422

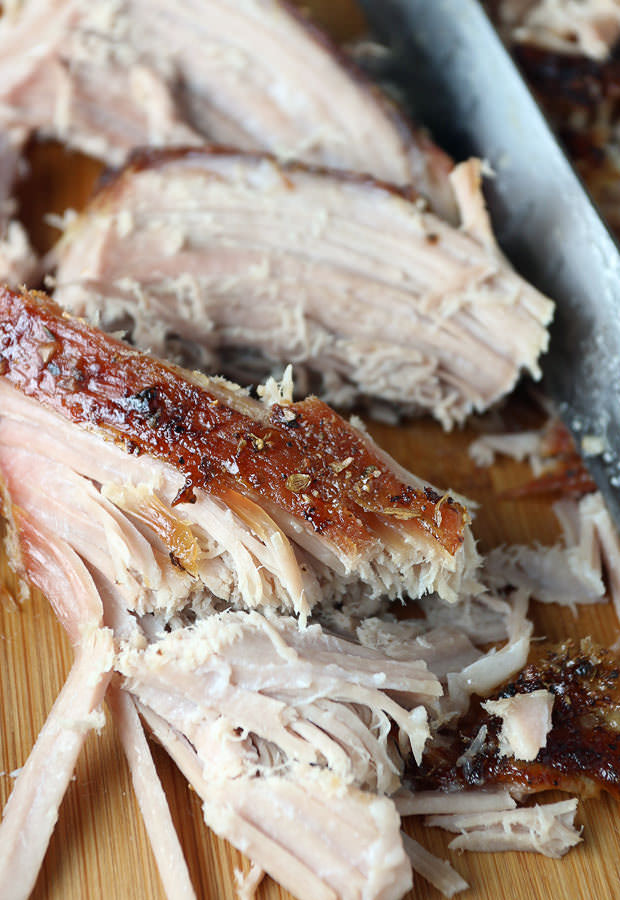
8. Serve up for family and friends alike – the pork should be completely tender, easily separating from the roast by pulling the meat off with your fingers.

Crispy Skin Slow Roasted Pork Shoulder That Pulls Apart With Your Fingers | Shared via www.ruled.me/

This makes a total of 20 (6 oz.) servings of Crispy Skin Pork Shoulder. 

ENJOY!

Tuesday, January 8, 2019

Craig Claiborne's Beef Stew

Yield:  8 servings

Time: About 2 hours

It would be hard to find a simpler meal than Mr. Claiborne’s hearty beef stew, which goes beautifully with buttered noodles and a stout glass of red wine. A small scattering of cloves adds a floral note to the gravy, augmented by just a little thyme, and the combination pairs beautifully with the carrots you add near the end of the cooking process, to prevent them from going mushy in the heat. Sprinkle chopped parsley over the finished dish, of course, a nod to the past that rewards in beauty and flavor alike.

Ingredients

  • 4 pounds lean, boneless chuck steak
  • ¼ cup olive oil
  • Salt and freshly ground pepper to taste
  • 1 tablespoon finely chopped garlic
  • 2 cups coarsely chopped onions
  • 6 tablespoons flour
  • 4 cups dry red wine
  • 2 cups water (or beef stock) 
  • 4 whole cloves
  • 1 bay leaf
  • ½ teaspoon thyme
  • 6 sprigs parsley, tied in a bundle
  • 6 large carrots, about 1 1/2 pounds, trimmed and scraped

Preparation

  1. Cut the meat into two-inch cubes.
  2. Using a large skillet, heat the oil and add the beef cubes in one layer. Add salt and pepper and cook, stirring and turning the pieces often, for about 10 minutes.
  3. Add the garlic and onions and cook, stirring occasionally, for another 10 minutes. Sprinkle with flour and stir to coat the meat evenly.
  4. Add the wine and stir until the mixture boils and thickens. Stir in the water. Add the cloves, bay leaf, thyme and parsley. Cover closely and simmer for one hour.
  5. Meanwhile, cut the carrots into one-inch lengths. If the pieces are very large, cut them in half lengthwise. Add them to the beef. Cover and continue cooking for 30 minutes, or until the carrots are tender. Serve the stew sprinkled with chopped parsley.


NOTES from other cooks

Trust your instincts on this one. Cook the beef in batches, cook the onions and garlic alone and then add the flour to the onions and cook to make a well browned roux before returning the beef to the pot. Allow most of the alcohol to cook off after adding the wine as it thickens. I went for adding rich flavor and used a cup of beef stock in place of the water.

I made the following changes to the base recipe:
I used 3 cups of wine (cab sauv) and 1 cup of beef stock
I let the alcohol burn off for quite a while (maybe 15+ mins)
I roasted some mushrooms and added them when I added the water
I cooked the whole thing about 30-60 mins longer than directed
I added potatoes and celery when there was 30 mins left
I added some extra thyme at the very end

Add fresh cranberry beans at the same time as the wine.

Add dumplings on top.

Serve this over mashed potatoes.

Add some tomato paste and more liquid if it's too thick.

Use a DASH of cloves, rather than whole cloves.

Enjoy!


from New York Times Cooking
https://cooking.nytimes.com/recipes/1321-craig-claibornes-beef-stew